


This first photo is to show that I have 4 squares layered up and they should all be lined up on all sides before you cut.


Take the second pile of 2 1/2" x 5" sections and sub cut them into 2 1/2" squares.

You can see in the photo below that I have folded over and pinned the 2 1/2" square to resemble the corners of the Flying Geese block. This is your visual of what you will end up with. Note the top red has no corners and the bottom cream has no center. This is because you will be adding other fabrics to create a longer border section.

Draw a line on the wrong sides of your 2 1/2" squares. Using the placement of the above photo, stitch your corner square onto the rectangle by stitching right along the drawn line.
You will see two stitching lines on the blocks. That is because I sew a second line a scant 1/2" from the first stitched line. See the next photo.


You can see here the ruler shows this as 3/8" of a space between the two stitched lines. I usually shoot for a 1/16" bit wider, but I don't worry too much about this.


Here you can see I've cut off the corners.


Press open, and you now have blocks, that when stitched together in the correct order, will create a chevron strip.

You can also create a scrappy chevron border by using fabrics that are in the same colorway and of similar value. A design wall is very helpful when working in this style. I find it helps keep me organized.

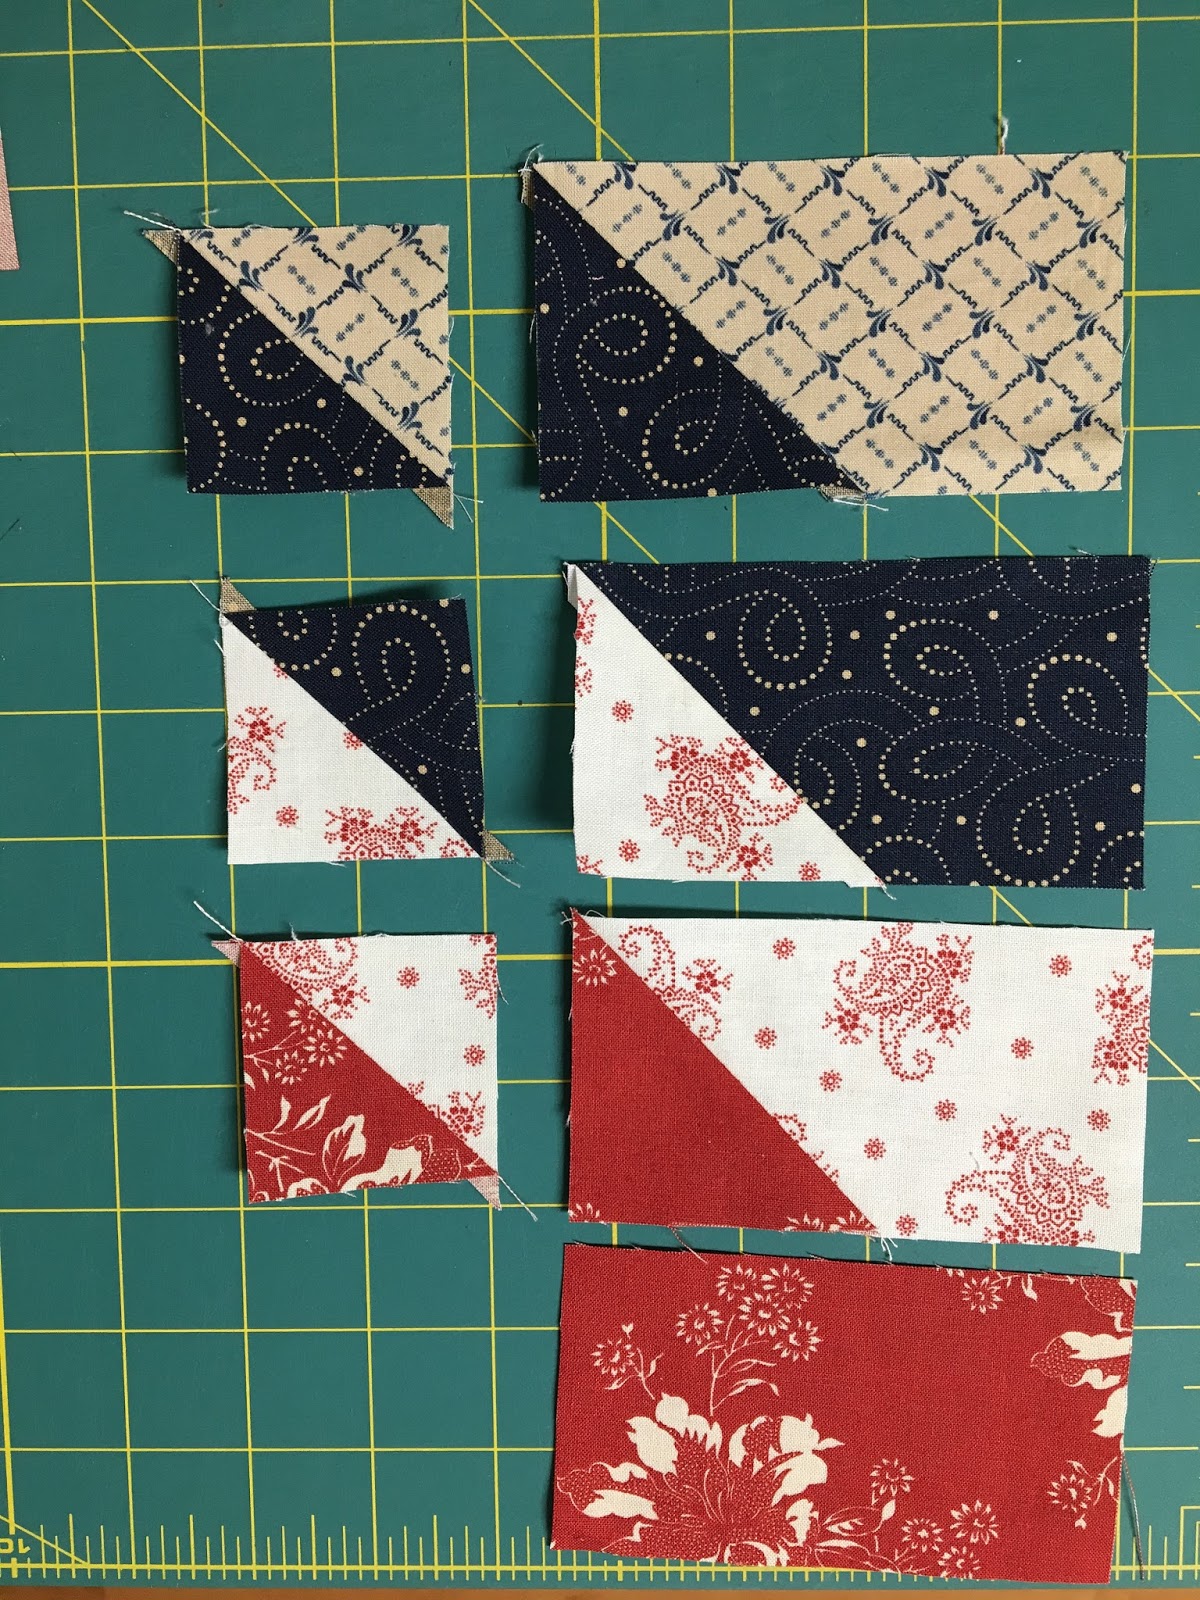
OK Lets get back to these "bonus" blocks. I learned this trick from Bonnie Hunter. She's loaded with great tips and tricks and this is one of my favorites. Using my ruler with the 45 degree line that goes to the corner of the ruler, I line it up along the center seam line and find the biggest size that I can trim this block down to. I know, sounds a bit backwards. Biggest, but trimming down. Stick with me! I can trim this to a 1 3/4" square


See this one, same thing. I can trim it to 1 3/4" square and have a perfectly good block to work with. Would I make these blocks from scratch. No way. But they are too good to put in the garbage.


Here I've put them together into a pinwheel block that will finish out at 2 1/2" We can all use pinwheel blocks in a baby quilt, in a border, as a center of a larger block, right?

Look at the heaps of "bonus" blocks you will create if you use this method of making a bunch of Flying Geese using this method.

I hope this post will help you make a chevron border, or even a few rows of chevron Flying Geese. It just takes a little extra attention to keep your colors all organized, but I think it was worth the effort.
Do you create bonus blocks? I think they're fantastic, and it's great to have a bag of extras every now and then. These ones haven't got a home yet, but I'm sure there will be another Americana quilt come out of my studio one of these days!
Keep stitching
Sharon
5 comments:
Very clever method on the chevron border, and I love how it looks on your quilt.
Absolutely, I save bonus triangles. And having them in red/white/blue is a double bonus. :)
I have made so many little quilts from these "leftovers" that many people toss away. I love the challenge, and I love having units ready to go when I need to make something up quickly.
As Janet says - very clever!
thank for the great tutorial
Great way to make the chevron border. I don't make secondary triangles unless my blocks are very large!
I really love this quilt!@
Congratulations Sharon! It is such a gorgeous quilt! I agree about medallions- love them!!
กำถั่ว
This is great! Will have to try it. Do you have a pattern for sale of that patriotic quilt?
Post a Comment