Sunday, January 27, 2019

X Marks the Spot - Color Collective Month Two

I've joined the Color Collective put on by Sewtopia  I would highly recommend getting in on the next session of this program as the first two months have been fabulous. Month 2 fabric arrived and I pulled out my bins of solids.  This time I had 3 colors that were close to matching.  This adds up to 19 new colors that I've got to work with in the first two months.  Talk about stretching outside my comfort zone.
Month 2 was all about Foundation Paper Piecing.  I've done this before, but have never made a whole top with this method.  It took me a bit to find my tools; postcard from my Mom and Dad on their Alaskan road trip, and my Add a Quarter ruler.  A must have ruler for this type of work.  And sew it begins.  Cutting and trimming and pressing and trimming and sewing and trimming and pressing. 

First three blocks using 9 of the 12 colors.  This project consisted of 25 blocks so I was trying to do math that would have me use each color in each of the 3 sections of the pattern.  I got dizzy after the first batch of blocks.

I kept at it. I spent about 5 hours in the studio yesterday.  It was interesting how my mind moved to certain things with color combinations.  One set had me think of marching band uniforms, others reminded me of school colors, NFL colors, etc  That was a tough hurdle for me.  I love the combo of green, navy and grey, but that screams Seahawks!
Here I've got enough combos done to start assessing the last few blocks for color and value.  I do love a good gold (cheddar) and had to restrain myself from using it too much.  At this point, 20% of the blocks had gold.  And lets talk about the fuchsia.  I had even more blocks with that color.  What you can't see (due to my less than stellar photos) is that there is a bright watermelon color and another color that looks like a creamsicle.  They seemed sharp, vivid, almost neon to me.  I finally pulled out one offensive block and set it aside.


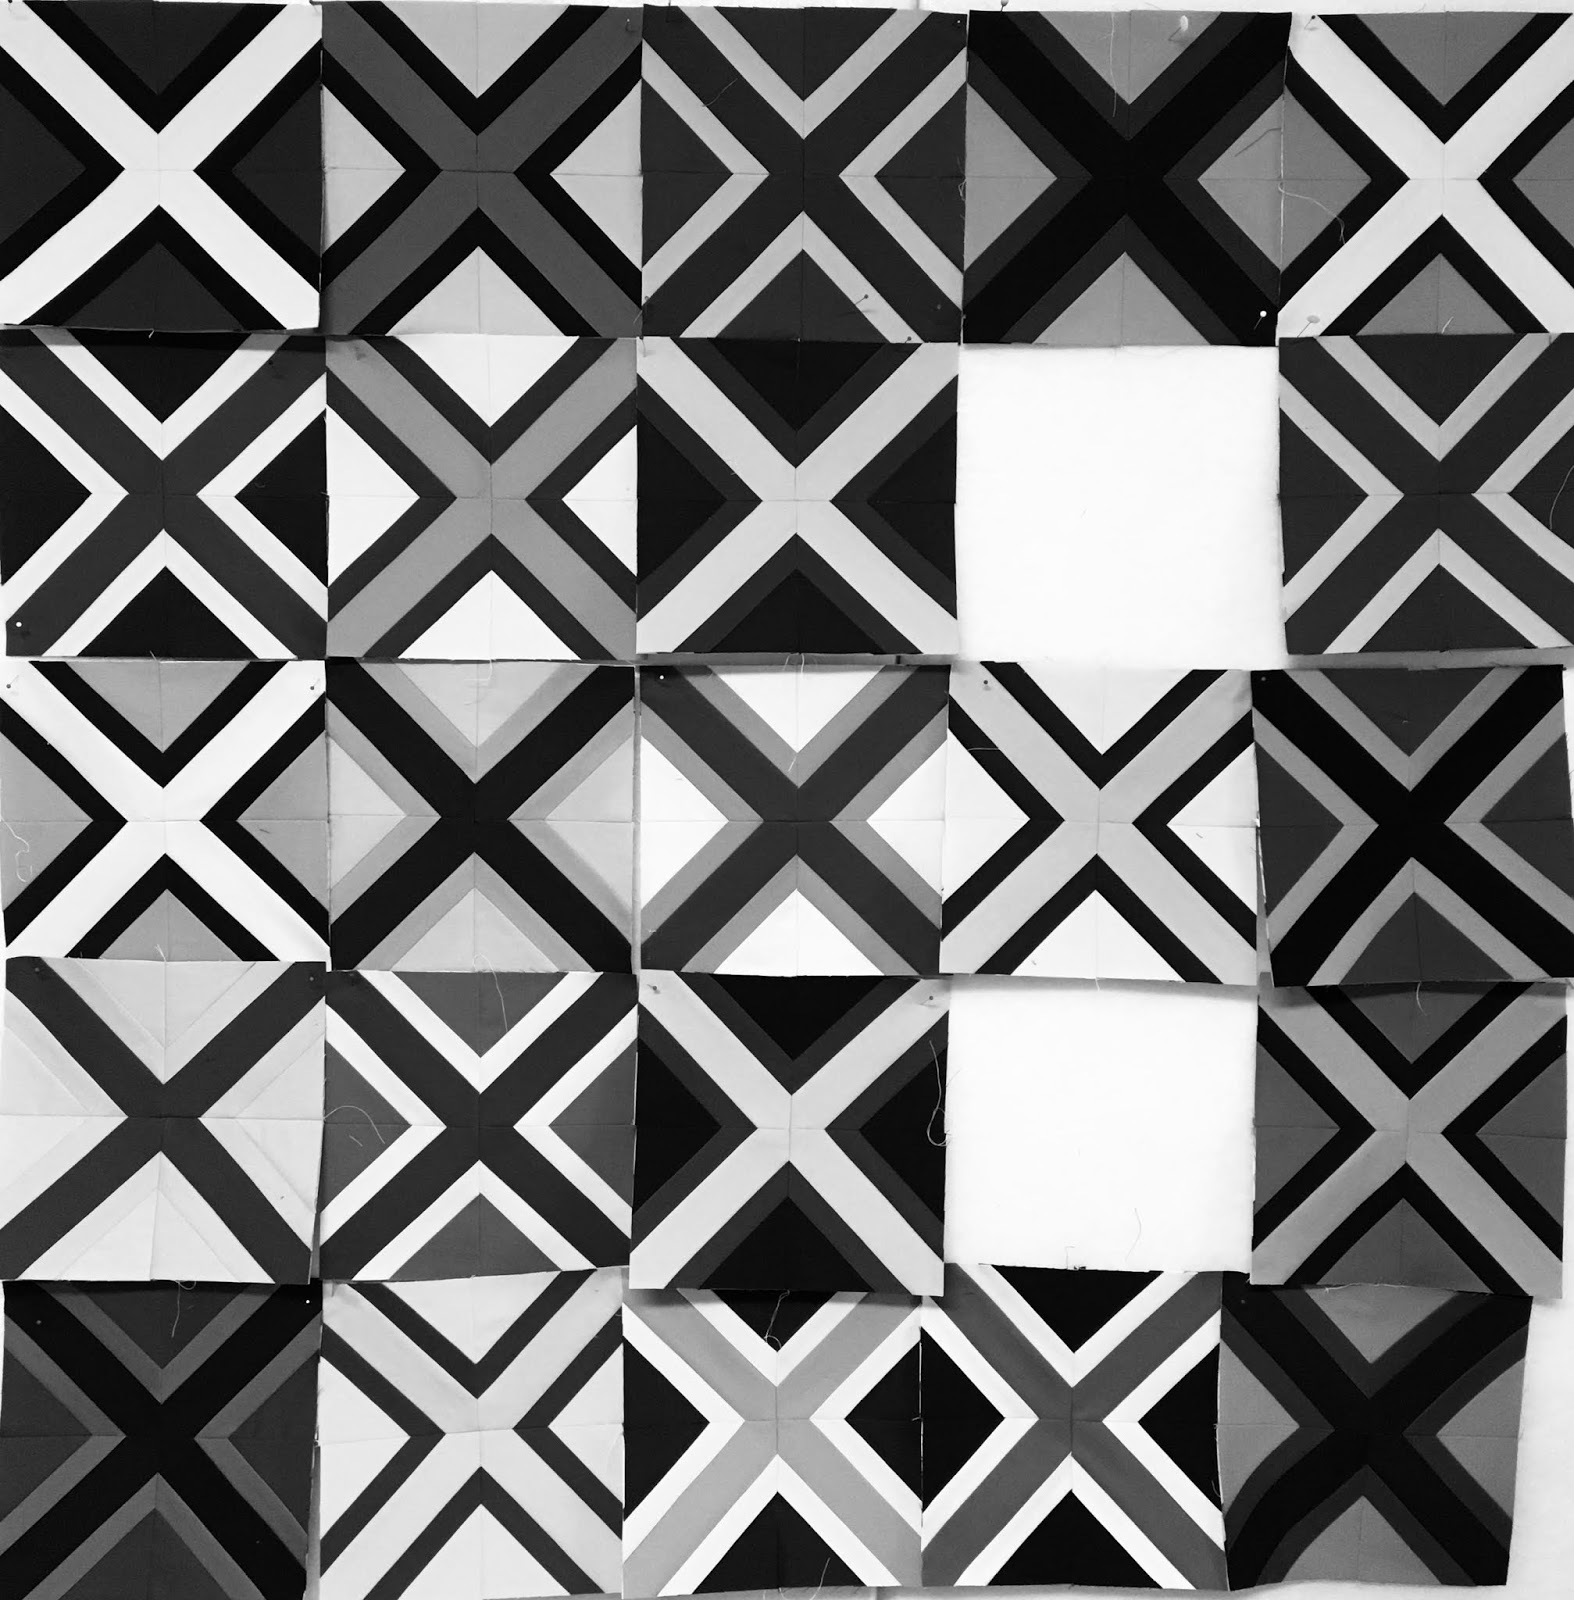
I went to my trusty black and white setting to see only value.  This makes you look at things in a very different way.

I made a few more blocks and only had 2 holes left to fill.  At this point, I put back the awful block as I added a touch more of that particular color and things started to balance out.  This was pretty dark along the right side but things were coming together for me. 
My last two blocks started with the outside triangle colors.  I wanted to make sure they were not the same as bordering blocks and I went with the dusty blue and fuchsia.

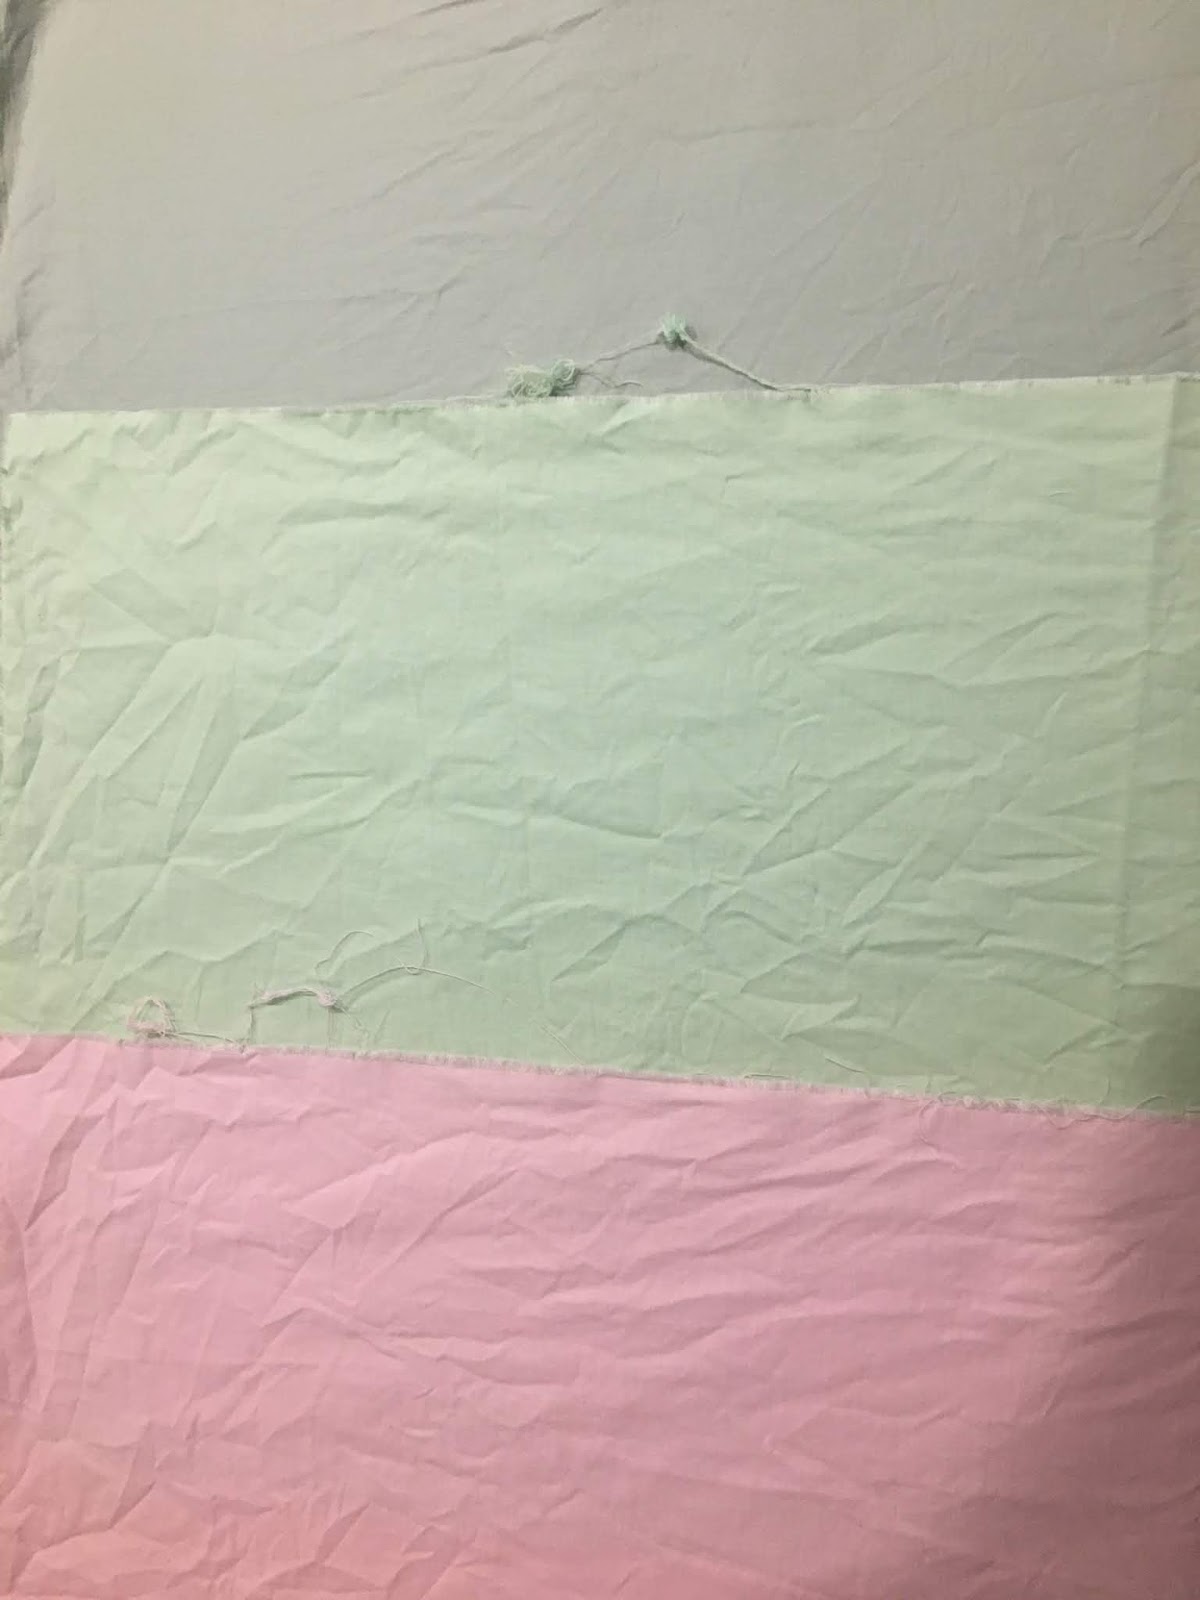
This next photo shows how I worked with dark and light strips.  The bottom part shows that when I put the burgundy fabric on the coral, I left a few threads of the coral showing.  When I flipped and pressed, (the top part of the photo), there is no shadowing of the dark color.

The finished block.  Oh how I loved this dark burgundy with the dusty blue.

In the last block, here came one more of these (hard for me to work with) colors.  That light mint green........ack!  But it really works in the whole project.


Here was my "not so final" layout.  I started back with the black and white photos, did some rearranging and committed to a layout.  This project is one of those where you can move and move and move and never come up with the "perfect" layout. 


I called it done, and sewed the blocks into a top.  Yes, on the left side I have two green X's on top of each other.  Geez!  But I am very pleased with the lessons I learned while making this one.  For some reason my blocks did not all nest together, which has my brain a bit puzzled.  I will be back in the studio doing some testing on why that happened.

I was concerned that my top would look fuchsia and gold so I kept backing off those colors.  They were two of the colors I had in my own stash and I used as second lighter value of gold in some blocks.  I also cut into my piece of fuchsia fabric, so in theory, both the gold and fuchsia should probably not even be in this photo.  These are my left overs from 1/2 yard cuts of all the colors.  You can barely see the dark burgundy, I sure loved using that color.  The color that was used the most was the dark green, and with 3 other greens in this range, I struggled to not have a green quilt top.

These were my colors that I pulled in.  A very dark navy, a dark forest/teal green, two shades of gold and a dark raspberry shade. I also added in a grey as that gave me an extra light without pulling in more of the corals and mint greens.  I did love the baby pink, but again, used it sparingly.

Last shot the finished top.  I love it.  Combinations were used that really stretched my comfort level but now I have a few more combos that I'd like to try out on a bigger scale.  The bottom row holds my favorites.  Left corner is burgundy, dusty blue and fuchsia,  and the middle bottom is gold, pink and dusty blue.  That was my biggest Ah Ha moment.  Gold, pink, blue.  I LOVE this combo.

So thank you Tara Faugnan and Amy at Sewtopia, for a fantastic month 2.  If you are on IG, you can see posts with the hashtag thecolorcollective  Check it out to see how others interpreted these color combinations.

I'll leave you with a fantastic sunset that we had on Friday evening.  Birch Bay at it's finest!


Keep stitching,
Sharon

Wednesday, January 16, 2019

Pressing Matters

One of the Facebook groups that I belong to recently had a short discussion on products that are used when pressing fabrics.  I have three kinds in my sewing arsenal, so I thought I'd share what I know about these products.


Lets talk starch.  This product has been around forever.  I remember linen tablecloths being starched and pressed and they would be like cardboard.  And how do you think cowboys get that crease down the front of their Wranglers?  Starch, lots of it, and a hot press. 

Sta-Flo concentrated starch.
This jug has been in my laundry room in 4 different locations.  I just keep moving it with me.  It's cheap, and it works.  $3.25 online at Walmart. This makes the equivalent of 7 - 22 oz cans of spray starch.  But it's starch.  This product needs to be mixed and you can control the amount of starch in your spray.  Some people will spray their damp fabric with starch, let it dry, and then iron it. Others give a quick spray and iron right away.  Be careful when doing this.  If you use a heavy hand when spraying, you can scorch your fabric.  You can always spray it a second time, so less is better with all of these products.  It's best to use this product when you are getting ready to cut your fabric.  Starch can attract bugs, so use it to give your fabric a crisp hand, but wash your quilt once it's finished. 

Easy directions to create the level of stiffness you want in your fabric/clothing.


MaryEllen Best Press 
This is a starch alternative.  It smells really nice, unless you are scent sensitive.  It comes ready to use and can be purchased in many sizes.  Most quilt shops sell this product.  A quick online search finds the small spray bottle (16.9 oz) selling from $7.50 to almost $13.00   You can buy this in bulk and refill your spray bottle, which is great to reduce waste.


Next up is Magic Sizing.  This is a lighter product than starch and I LIKE it.  No, actually, I LOVE it.  It's cheap.  I've paid $1.14 up to $2.99  Depends on the store.  Think big box vs corner grocery store.  It's an aerosol product which can be a downside for some.  That is the best part, it sprays evenly and I can get a very light "dusting" of it on my fabric.   I don't get dots of spray like I do when using the hand pump type of spray bottle.  And it's cheap. 


Here is a test run of each product.  All three fabrics are from the same manufacturer, Kona Solids.  All three were washed and dried on a rack so everything is as controlled as possible.  I use a DRY iron.


All three are pretty even once they got the same amount of time under the iron. Truly, the end result is that I have fabric that is prepped and ready to cut. Now to wash the darks that came in my latest package and get busy!


The bottom line, use what you like and can afford and what is available to you.  
Disclaimer: I prewash all my fabric. It never enters my sewing room unless it's passed through the laundry room. Once it's washed and dried on a rack, I lightly press and fold. No starch, no sizing, no Best Press. I save that for when I am cutting. I have to give the fabric a press after I unfold it from the bin, so why do the same work twice. If I'm pressing to cut, I only spray the general area that I will be cutting off.
By having fabric that is smooth and wrinkle free, your cutting will be accurate and that is one part of the process that helps give us quilt blocks that finish the correct size and lay flat.

When you are pressing your piece work, use a LIGHT hand when spraying.  Yes, these products help us get our seams to lay flat, but be careful to not distort the shape of your pieces.  So what products do you use to help wrangle those wrinkles?

Keep stitching,
Sharon

Sunday, January 13, 2019

New Book - Welsh Quilting Design

Welsh Quilting Design by Sandie Lush  will be an excellent addition to any quilters library.  I have to admit,  I keep saying that making a Welsh quilt will be my retirement project.   I purchase any books that look good and this one is FANTASTIC!

Sandie wrote this from the perspective of history, not so much as a "learn to hand quilt".  The designs and photos are simply incredible.   It starts out with basic motifs and takes the reader on a step by step process to create amazing designs.  She adds in grid layouts, borders, background fillers and so much more.

I am sharing a very small amount of this book.  It's packed with amazing designs, layouts, step by step samples of creating complete quilts. Your finished layout can be a basic motif repeated across the quilt top, or complex with a multitude of ideas and designs.

There are several full quilt designs.  I highly recommend this for any hand quilt enthusiast.  The ideas go on and on.  Every page brings something new and interesting.

I do hope you will go online and purchase this book.  Yes, online.  She has self published this book so she was able to maintain complete control over the content.  It's a must have for any quilter.

Keep stitching,
Sharon

Monday, January 7, 2019

The Second Colorway - Rich Traditions

A short, self promotional note to begin this post.
I've added my available lectures and workshops to my blog, link above. This is one of the workshops I'm offering. I'd love to come teach or trunk show at your guild or group.

The piles slowly mount up as I cut stacks of 1/2 square triangle combinations for a second version of my Rich Tradition that appeared in APQ this past year.  For this quilt I needed 400 of these blocks, so that's 800 pieces.  That might sound overwhelming, but with using strips and the Easy Angler ruler, it is a piece of cake.

The endless chain of 1/2 square triangles.  It can seem daunting.  But trust me, when you get into production mode, this is a tried and true technique. It uses strips instead of squares, no trimming down required, and the little dog ears get trimmed when you cut the blocks apart after pressing.

I took a multi colored, big fabulous print.......

and pulled and cut a strip of 25 solids that I matched up to some of the colors in this big print. Then I  got busy.

Each block needs 16- 1/2 square triangles for the border and with the above method, it's a great pattern to prep and take with you for a retreat, or just to have something quick and easy to sew when  you only have a few minutes in your studio.  The block sashings quickly come together.


Black and white on the camera/phone always helps put the value into perspective.  I was positive this lighter green block would be in the center or maybe not included at all.   I loved how it bounced off all the other colors and added a bit of spark to the finished piece.

Clearly it was not going to live in the center, but it was perfect for balancing off another lighter block in the finished piece. Using a little bit of creative cutting, I got the striped setting triangle fabric to all move in the same direction.

Quite a dramatic difference just by changing up the prints/colors.  This bottom photo uses a variety of small and large 1800's prints in a various colors, and all the backgrounds were shirtings. 
As mentioned at the beginning, I am now booking outside my area (Pacific NW) for trunk shows and teaching. In 2018 I was a guest speaker at several guilds and have taught regionally for several years. With many patterns published in national magazines, I'm spreading my wings. I have dual citizenship with the US and Canada, and I'd love to come visit your guild. Please share this information and/or contact me for available dates.

Keep stitching,
Sharon

Friday, January 4, 2019

The Color Collective

Happy New Year!  I hope everyone had an enjoyable Christmas season, and that as we move into the first weekend after New Years day you are ready for some stitching, instead of cooking and cleaning!

We do not get all Amazon crazy at Christmas. I ask for a tube of my favorite hand lotion from the drug store.  But this year I also asked for The Color Collection six month subscription from Sewtopia and Tara Faughnan

Twelve 1/2 yard cuts of Kona solids, curated by Tara.  You also get a pattern each month to download and there is a FB page and IG group for all members.  It's a fabulous value and I wanted to stretch my color confidence this year. Month 1 started with this group and the pattern Color Pop


This is just a test, do not adjust your color monitor, repeat, this is just a test.  I waited and waited and waited for the UPSP local office to deliver my fabric.  I guess 8 days to get a 2 day priority that looked like it had been run over a few times wasn't too bad, right?

I pulled some fabric for at test run on the pattern and process and made these 4 blocks.  They are 6" finished.
 After cutting out cardboard templates for the pattern, I remembered had a stacks of circles I had cut out when I started longarm quilting.  And I had a rotary cutter for circles.  I was in business.


I grabbed a stack of 4 1/2" strips I had pinned to my design wall, (remember, I'm still waiting for my 2 day Priority package), layered them 4 high and cut out squares and circles.

Although color seems to get all the glory, value does the good work.  Second column from left, top two blocks.  In real life, they looked good.  Very similar color and I thought it gave some interest to the piece.  Note: I think it's more challenging working with such a small finished size.  This will be 20" x 20"  

After flipping my camera to black and white, I knew this was just better, and I committed to the layout.
Here is my finished piece.  Circles are 3 1/2" and the block finished at 4"  I can see how it need tweaking if I want it to have the same look as Tara's pattern.  The backgrounds needed to be trimmed a wee bit more so the circles are almost touching.  I love this and it will be gifted once quilted.


So getting back to my 2 day Priority package, it finally arrived.  I can't wait to see all the colors in the package.  I have a *few* solids in my stash, so I was hoping some of the 12 colors would be different from what I have already.


This one came up as a close match to what I already had.  Not a surprise as my favorite colors are red and cheddar and this falls into that gold/orange/cheese colorway.   And yet, as I tell you I love red, note that there is virtually NO red in my solid bins.

The second winner was this lovely shade of fuchia.  It's on the bottom, and I had 2 that were close.

One would think with 20+ greens in their basket, surely they would have a match.  Not even close to something in my bins.

The moral of this story?  Let someone else pick your fabrics once in a while.  If you try it, you might like it.  I'm super excited to see what each month brings. January is paper piecing, and I've done a little bit of that.   I'm committing myself to work through each pattern using the colors and methods and I can tell already that I have been pushed outside my box. I think that's a good way to start a new year.  Tell me what you want to learn this year?

Keep stitching,
Sharon