Friday, May 29, 2020

String Flowers Revisited

String Flowers started to come together in a Gwen Marston workshop and ended up being published in American Patchwork and Quilting.  This class was titled as Strings, so I didn't bother to read any the the class supply/info list and showed up with my string patches, an idea and Gwens String book.  I knew Gwen would give me "hands on" instructions/inspiration, and I couldn't wait to get started. With her guidance this was the end result.  This version was hand appliqued and hand and machine quilted.

None of the string petals are stitched to a foundation.  I strung together enough fabric to cut out my petal shape and appliqued them down.  If you look closely, you will notice I cobbled together different greens for the leaves. The stems are all going in different directions, the leaves placed in various positions. The fun of working this way is that you don't make 4 identical blocks, but you make something that is creative, and uniquely your own design.


It turned out that the class required yardage! Oh well, I was able to make a few sample blocks to take home and play around with the class technique.  I ended up using the class technique that Gwen taught as the outer border for this second color version.


Here is my second version that was machine appliqued.  I also faced this piece. Instead of appliqued leaves, I used a 12 wt thread matching the stem and did some big stitch embellishment.  Notice that I machine quilted right over the big stitch.  The stems were machine stitched along the edge while the petals were machine sewn with a blanket stitch. The flower petals were hand quilted to add a bit more texture.


I tried out some new to me tape.  3M Scotch brand green tape for ROUGH SURFACES.  It's a painters tape, but I was able to stick quilts to a concrete wall and the side of our condo.   I tucked this in behind a blooming rhododendron. It was vibrating with so many bumble bees buzzing in and out of each blossom.

So many bees that it was quite easy to get this photo.


The link to another version and the pattern is at the beginning of this post. Here is APQ's second colorway that they showed.

So get buzzing and string a few patches together to create your own string flower garden. There are no rules, just guidelines and ideas when working with strings. If you string your favorite fabrics together, cut shapes you like, then the quilt will be your unique creation. Just have fun.
Keep stitching,
Sharon

Tuesday, May 26, 2020

Color Collective 6 Pointed Stars

This post could also be titled "Five Star Review" for Sewtopia and their 6 month Color Collective. For six months you will receive a bundle of solids along with a pattern by Tara Faughnan.  The one I'm sharing today is from the first season.  It was the last pattern and I wanted to hand piece these stars.


I made about 65 stars and I pulled fabric from previous months to give me a larger variety.  Here I am contemplating putting a large hexagon between the stars, but the quilt seems to be so large.


I went with using a diamond between each star.  The next part was choosing a color for the setting diamond.

Taking a quick look using the black and white setting on your phone/camera  will help determine dark sections in your layout.

Once I started joining the stars with the black diamonds I realized that piecing the whole row together might be a bit awkward when joining all the rows together.  I decided to work in chunks.  

Here I have the top section pieced into  quadrants.   Putting 4 quadrants together was much easier that working with full rows.  Once this was together, I worked on finishing the edges.

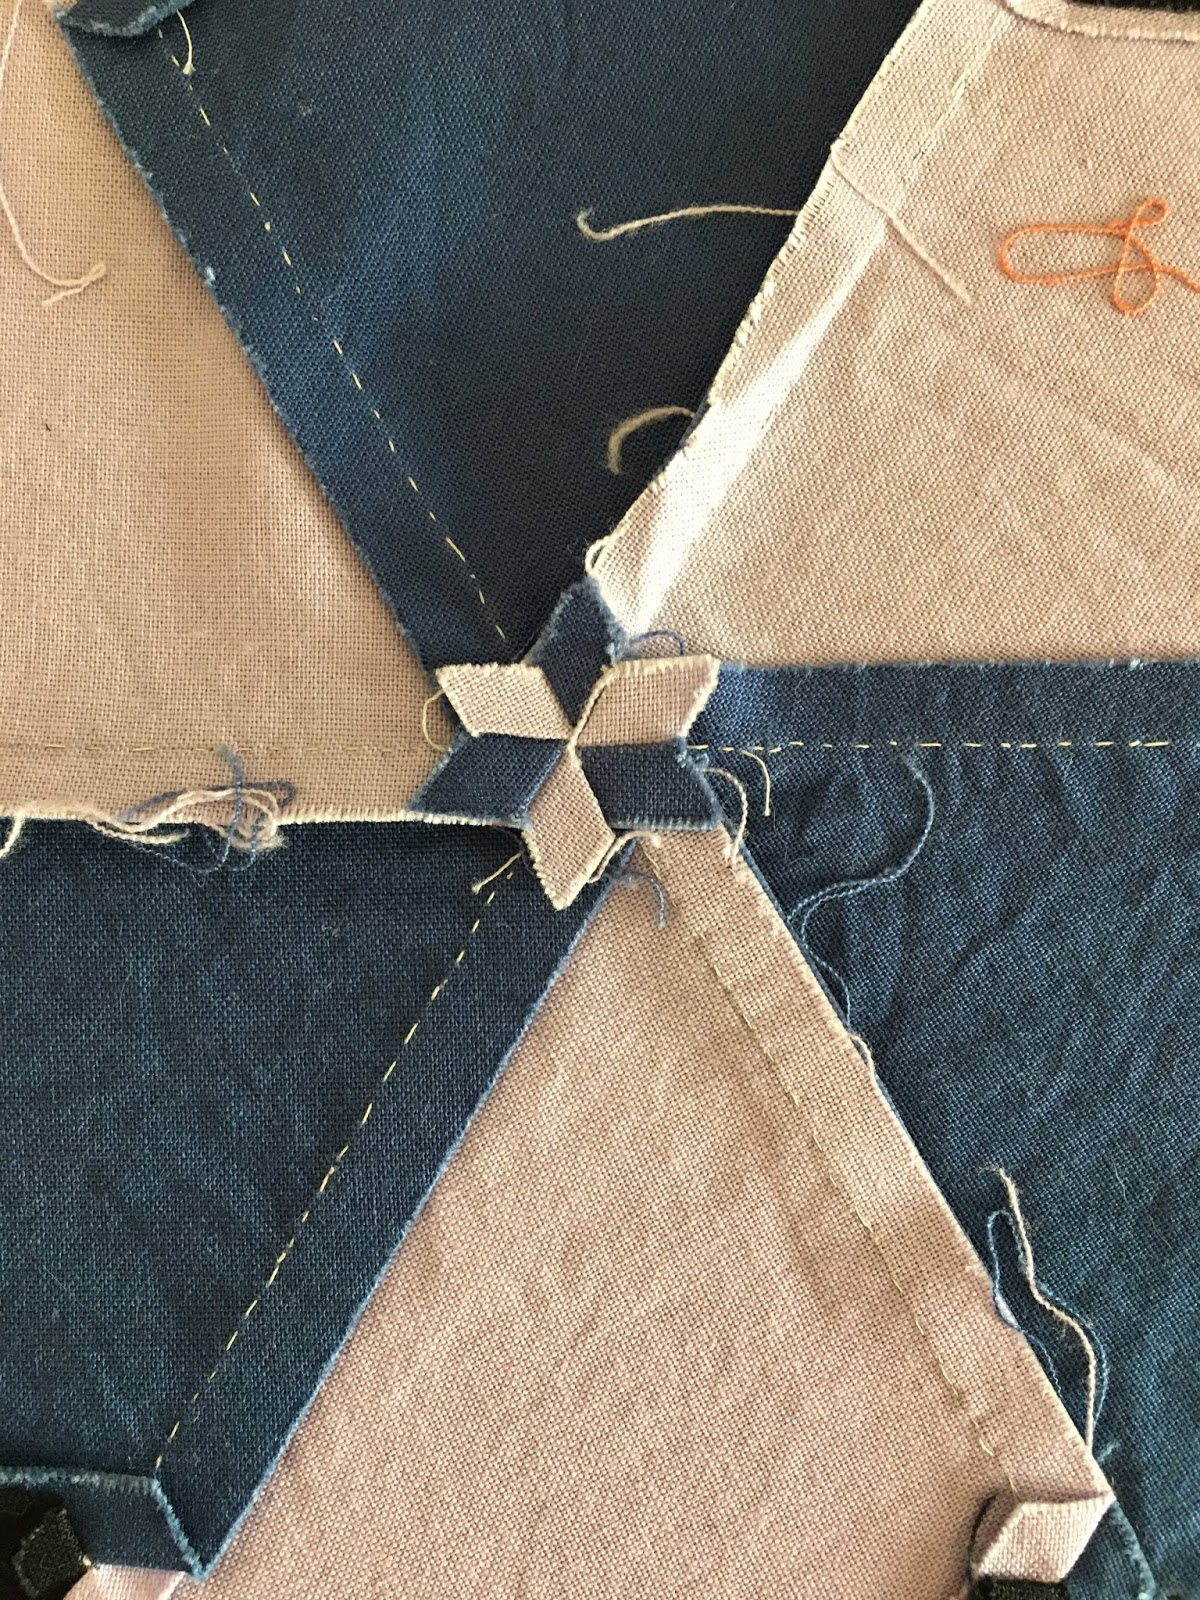
Two hours of pressing resulted in every seam spinning and laying nice and FLAT.  That's the beauty of hand piecing.  You can manipulate your seams. For this reason,  I never press hand pieced units until they are all together.

Oh, the sweet satisfaction of my star centers!

So what's so great about the Color Collective?  Let me show you.  Here is my own selection of solids that I've accumulated over the years.  Notice how many greens, creams, and cheddars to browns I have?


Here are the untouched bundles of the selections that Tara curated for Season 1 and 2.  Notice all the berries, limes, aquas and purples?  Yup, she pushed me over the edge of my color box.  I have worked with combinations I would never have chosen, and making decisions based on a selection of colors chosen by someone else is quite freeing.  The patterns are definitely aligned with working with solids and you have to up your game as every seam shows. 

I have done hand pieced 6 pointed stars before, so this technique was not new to me.  Making all the centers as good as I could mattered when working with solids.  This series was about was trying new color combos, learning new techniques (as I have with many of the other monthly patterns), and stretching my boundaries.   I've done 2 series, they have a private FB page, video demos, FB chats, IG chats and the pricing is excellent.  Plus members get a discount for the 6 months on any other purchases from Sewtopia.  If you are not familiar with Tara's work, check out her patterns.  They are clearly written, great line drawings and her social media is a wealth of inspiration.

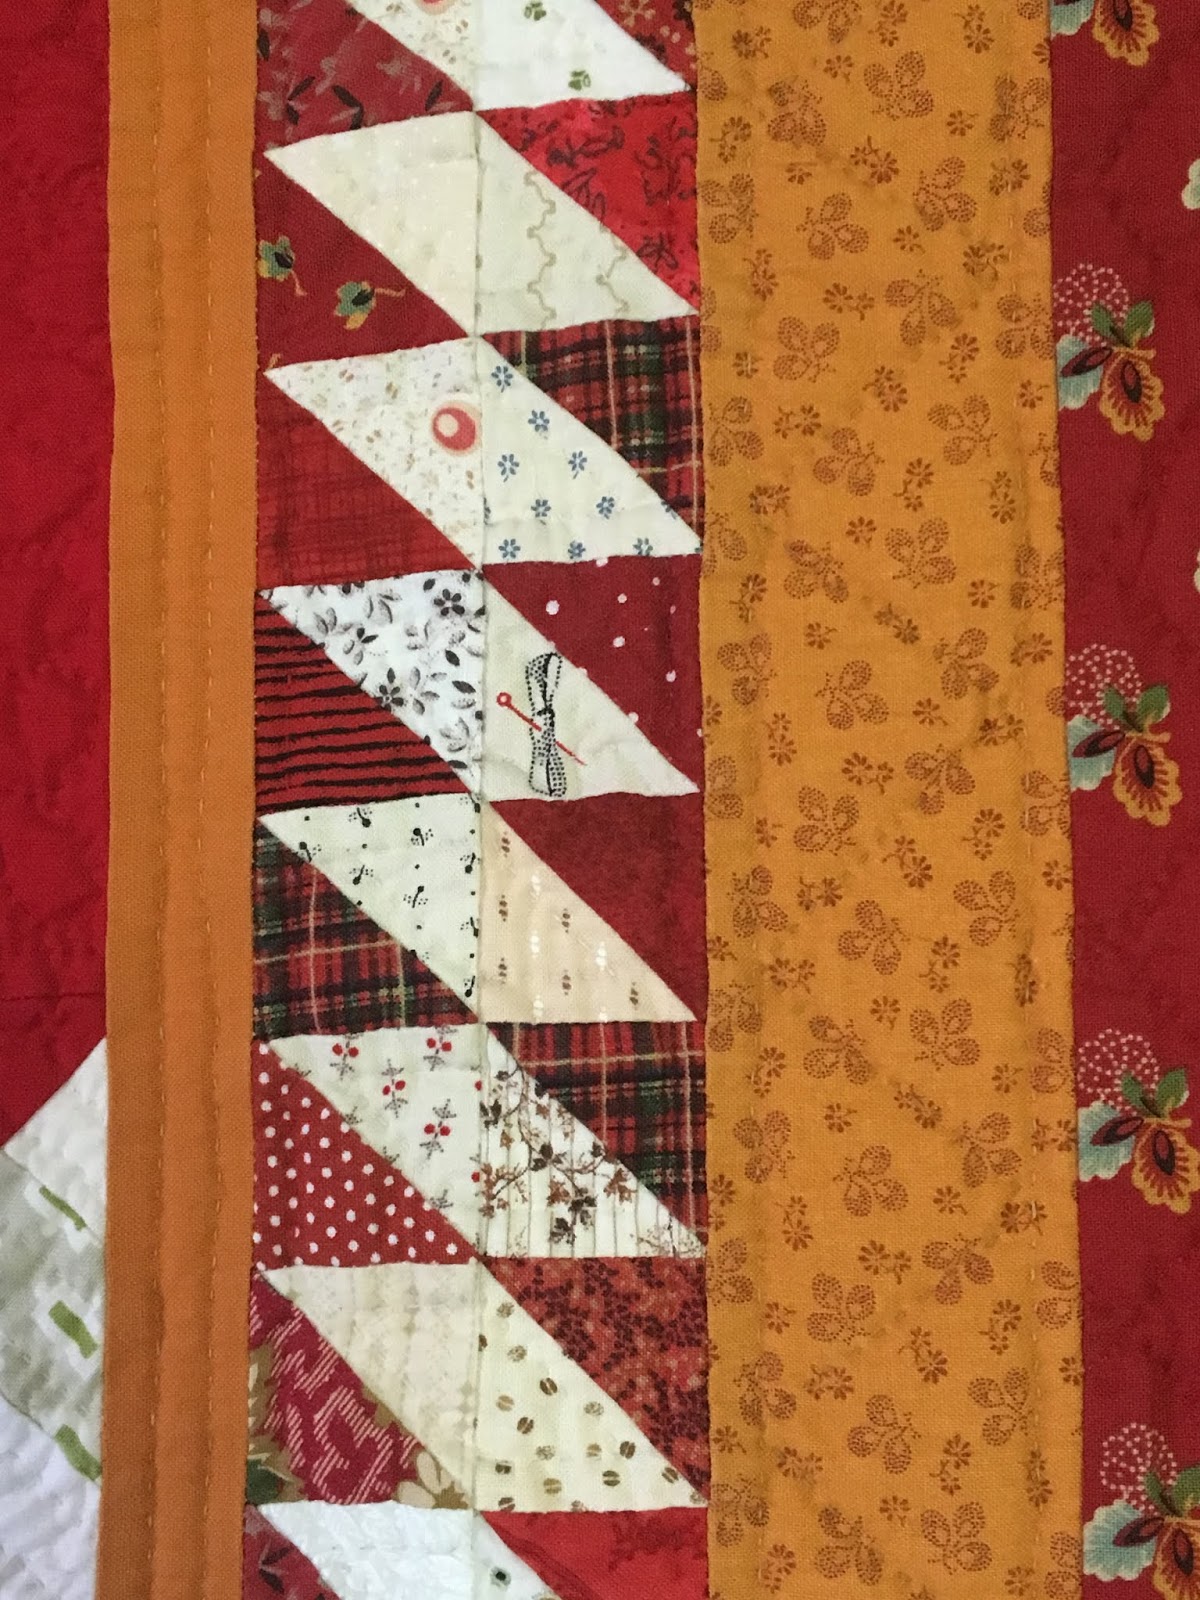
This piece finished at 62 x 64.  When oriented this way, it can look more like Tumbling Blocks.  Any way you look at it, I think it's fantastic.  Once it's quilted, I will trim back the top and bottom edges, I used pre made stars along the border, ones that were extras that didn't make the cut for the center.  Black batting will be used and I am going to hand quilt it.  (who know when!)

Keep stitching,
Sharon

Thursday, May 21, 2020

Step by Step String Block

I've been asked how to make the string blocks that I used in my Zig Zag quilt I showed last week. Photo step by step as follows.  Here is the finished block. 

Choose what size you want your block to be and cut your solid square that size.  It can be any size as long as they are all the same.
Mark a line 1/4" away from "corner to corner"  as your guide for your first strip. 


Now your base is ready to go. Notice the line is NOT corner to corner, it is offset by the 1/4"


Take your first strip and lay the raw edge even with your DRAWN line.  Make sure the strip extends over the block on each end.

Stitch using your usual 1/4" seam allowance and this will start your string side of the block.

Press over the stitched seam and your corners should be covered by the strip.  Your strip will overhang the edges.  DO NOT TRIM.


Put your next strip down, RST, and line up the edges.  Stitch with 1/4" and flip it over.

Pick your next strip and repeat.  DO NOT TRIM any of the overhang.  You will do that at the end.

I dug through my scrap bin for a triangle shape for the last piece.  Make sure that last piece overs the whole foundation fabric.  Remember that you will be sewing your blocks together so having thin strips right to the corner can make for bulky seams when you join the blocks.

Here is my finished block with all the strips stitched down.  I do press with an iron along the way, and I don't worry if my strip is not exactly straight.  A little wonky adds to the charm of strip piecing.


Flip your block over and use the base as your guideline for trimming.


Using your ruler, trim the overhanging strings right to the edge of  your base.

Both sides are now trimmed,
Flip your block over and admire your new string block.  It's that easy!

The bigger the base, the more strips you will need.  Make your strips various widths for interest.  Set the blocks in any pattern that uses 1/2 square triangles.  I have used different blacks in my piece.  I do think it's best to stick with one color for the base block, but using shades and tones of the same color can add some interest.  Be careful though, these blocks are like pototoe chips, you can't just make a few!

Keep stitching,
Sharon

Wednesday, May 20, 2020

Doll Swap by Humble Quilts

For many years, Lori at Humble Quilts has been organizing Doll Swaps. This year I almost missed it, and that would have been a shame. Getting in right under the wire meant that my name went to Liz B. from Lucas, TX and lucky me, this is what she made especially for me! It's hanging on the wall in my studio so I get to look at it every day.


Here is the one I sent across the country to DeEtta B, from Fiddlehead Finery  This little tumbler one block piece has traveled all around. I started it on my trip to Thailand last May (where I should be right now, but that's just the way the world is turning). It has also traveled to Toronto, ON and Maui, HI. It finally got finished in Birch Bay, WA and now has a home in WI.


If you get a chance to participate in one of these swaps, I highly recommend it.  You never know what treasure will appear in your mailbox. Thanks Lori!

Keep stitching,
Sharon


Wednesday, May 13, 2020

Zig Zag Strings

My zig zag quilt has been shared before, but I'm going to be posting about each of my string quilts over the next few weeks. First off, I LOVE this and wish I had stayed the course and made this into a king size quilt. Yes, you heard me, KING.


My love for 1800's reproduction fabrics had consistently been met with "Civil War prints are soooo drab."  I've learned a few things about this over the last few years. I now refer to these prints as 1800's reproductions since the Civil War time frame is only about 15 years.  1800's reproduction prints and designs span 100 years, so there is plenty to pick from. I do gravitate to the brighter side of things and this piece showcases many of the scraps in my sewing studio.


Did you notice that the blacks are not the same? It was a great way to use up those smaller, random solids of black that seem to kick around the studio. Not enough for a whole quilt, but too big for the scrap bin. The method I used for this is the "stitch and flip" method so the black fabric is the base behind all the strings. I start with a bigger block and then trim down after the strips are sewn down. After that, they are simply a 1/2 square triangle and you can have a lot of fun arranging them on your design wall.


I do love a good zig zag! And use your favorite fabrics. If you don't have a long enough strip, just add onto it. They don't even have to be the same color. You can see I have cobbled together two strips to make this block.


This is a fun and relaxing way to stitch up some blocks, and burn through some of the boxes, bags or bins of left overs that seem to multiply overnight.


The best part of working with strings is that you don't have fuss and it doesn't take much concentration; something I seem to be lacking these days.

Keep stitching,
Sharon

Friday, May 8, 2020

String Stars

Everything I love about quilts and quilting are in this string star piece.  It was made in 2013 with the help of the amazing Gwen Marston during a retreat on Lopez Island.

It contains strings
It was created using Gwen's liberated star techniques.


The cheddar border bleeds into the corner blocks for a unique look, and that is a result of "using what you have".


It's hand quilted and has feathers in the solid red areas.

 The diamond border is all half square triangles that were bonus blocks from a Bonnie Hunter Mystery quilt. And no matter how hard I try to keep prints away from each other, this usually happens.  Really?? 3 plaids so close together??


The outside print gave me a grid for the border hand quilting.


It's red and cheddar and we all know "cheddar makes it better".
I hope you get out for some activity and fresh air this weekend.
Sharon

Saturday, May 2, 2020

May Day

When we were in elementary school we used to have a May Day celebration.  Right now those words seem more like the distress signal a captain would use.  Here in WA we got our "Stay Home, Stay Healthy" orders extended to May 31 with a slow roll of openings.  There is a 4 stage plan that takes us into July!  As we all are anxious to get 'back' to our daily lives, here are a couple of quilt backs.

My work quilting has essentially been at a stand still.  Each of us has made different decisions based on our own personal situation.  For me, I have been very strict with our movements, prior to our government asking us to stay home.  Having quilters drive to my place for a non essential item just didn't sit with me as I too, was not going anywhere non essential.  No judgement on how each of us has handled this unprecedented time in the world.  I was ok with my decision and that's what was important.  However, I can't wait for the CA/US border to open up so I can go visit my Dad

My studio will be back open for customers once we can start moving around outside our close circle of family/neighbors.  I've got a list started so if you'd like me to quilt something that you've finished in this "stay at home" time, please shoot me an email or a text.


Feathers, straight lines, all over designs.  Whatever your quilt top requires, I can handle it.  I'm still stocking Hobbs 80/20 and Hobbs Tuscany Wool and have added the Hobbs 80/20 Wool/Cotton along with a roll of Thermore. (great for runners and wall hangings)

Stay safe, stay healthy, and when things start to open up again, and we find our new normal, take it at your own pace.  We all have our own internal guidance that we can follow. I hope you have been taking care of more than housework.  As for me, my house looks the same, OK, it's dustier!  This new housekeeper we have isn't very good at keeping up with cleaning, she's rather be stitching.

and where the heck did April go?  It's like "poof" and now it's May???
Be kind to yourself, 
Sharon