Showing posts with label stars. Show all posts

Saturday, August 8, 2020

To Give and To Recieve Swap Block

The latest issue of American Patchwork & Quilting is hitting the newsstands and mailboxes this week.  I'm sure subscribers are anticipating this new issue, especially considering the times we are living in right now.  It's jam packed with great projects and I'm thrilled to be part of this issue.  I can't imagine all the puzzles the staff had to solve to get this to your doorstep.  I hope you enjoy every page of it!

 I first blogged about this project here.

Photo courtesy of American Patchwork & Quilting Used with permission © 

 First I must give a big shout out to Barb,  from Fun with Barb, who hosted this fantastic swap. I also have to thank my stitching pals who offered up their scrap bags so I could get such a variety of prints and colors for the 16 patch blocks.  Even Jody (editor of magazine) sent me a goodie bag of scraps.

The best part of participating in a swap is getting that envelop in the mail, and anticipating all the different colors and prints that will become part of a quilt.  I knew I could not let these star blocks get tucked away in a box or bag so I got busy right away.  Here I am testing out the 16 patch blocks with swapped star blocks.  Look at all those prints and colors!


Testing out more 16 patch blocks and realizing that I need to keep the lighter squares away from the corners of the blocks.
Once I had all my blocks made I started playing with the layout.  One challenge is balancing out both color and value.  The other consideration was spreading out the blocks based on whether they were all one fabric or two toned.

Using the black and white setting on your cell phone is the best way to work out the values of all the star blocks.

I love the name the team at American Patchwork & Quilting gave this quilt.  It's perfect for this swap block quilt.
Photo courtesy of American Patchwork & Quilting Used with permission © 


When deciding on the quilting, I wanted to keep it very simple and clean.  The fabrics are the star of this quilt and I didn't want to detract from the huge variety of prints and colors.  Straight lines and neutral thread did the trick.


The cover quilt is pretty fabulous, along with many other patterns in the issue.  "Meet the Maker" is also a great section to introduce you to quilters that might be 'new to you'  There is a lot going on in the design world right now, and AP&Q have captured a lot of it and packed it into this issue.

I hope that you take some time to enjoy this issue.  Maybe you will find a project of two that you can start prepping for and work on during the upcoming fall months.  All the staff at AP & Q have stayed hard at work under these challenging times.  A big thank you to them for always making my work look so good!  

Please share any projects and tag the maker.  Me, you can always see whats happening on my Instagram page #grassrootsquilting  Hop over there, follow along, and tag me on any of my projects.  I love to see how others interpret my patterns.

Stay safe, mask up and keep stitching.  We are all in this together!

Sharon


Tuesday, May 26, 2020

Color Collective 6 Pointed Stars

This post could also be titled "Five Star Review" for Sewtopia and their 6 month Color Collective. For six months you will receive a bundle of solids along with a pattern by Tara Faughnan.  The one I'm sharing today is from the first season.  It was the last pattern and I wanted to hand piece these stars.


I made about 65 stars and I pulled fabric from previous months to give me a larger variety.  Here I am contemplating putting a large hexagon between the stars, but the quilt seems to be so large.


I went with using a diamond between each star.  The next part was choosing a color for the setting diamond.

Taking a quick look using the black and white setting on your phone/camera  will help determine dark sections in your layout.

Once I started joining the stars with the black diamonds I realized that piecing the whole row together might be a bit awkward when joining all the rows together.  I decided to work in chunks.  

Here I have the top section pieced into  quadrants.   Putting 4 quadrants together was much easier that working with full rows.  Once this was together, I worked on finishing the edges.

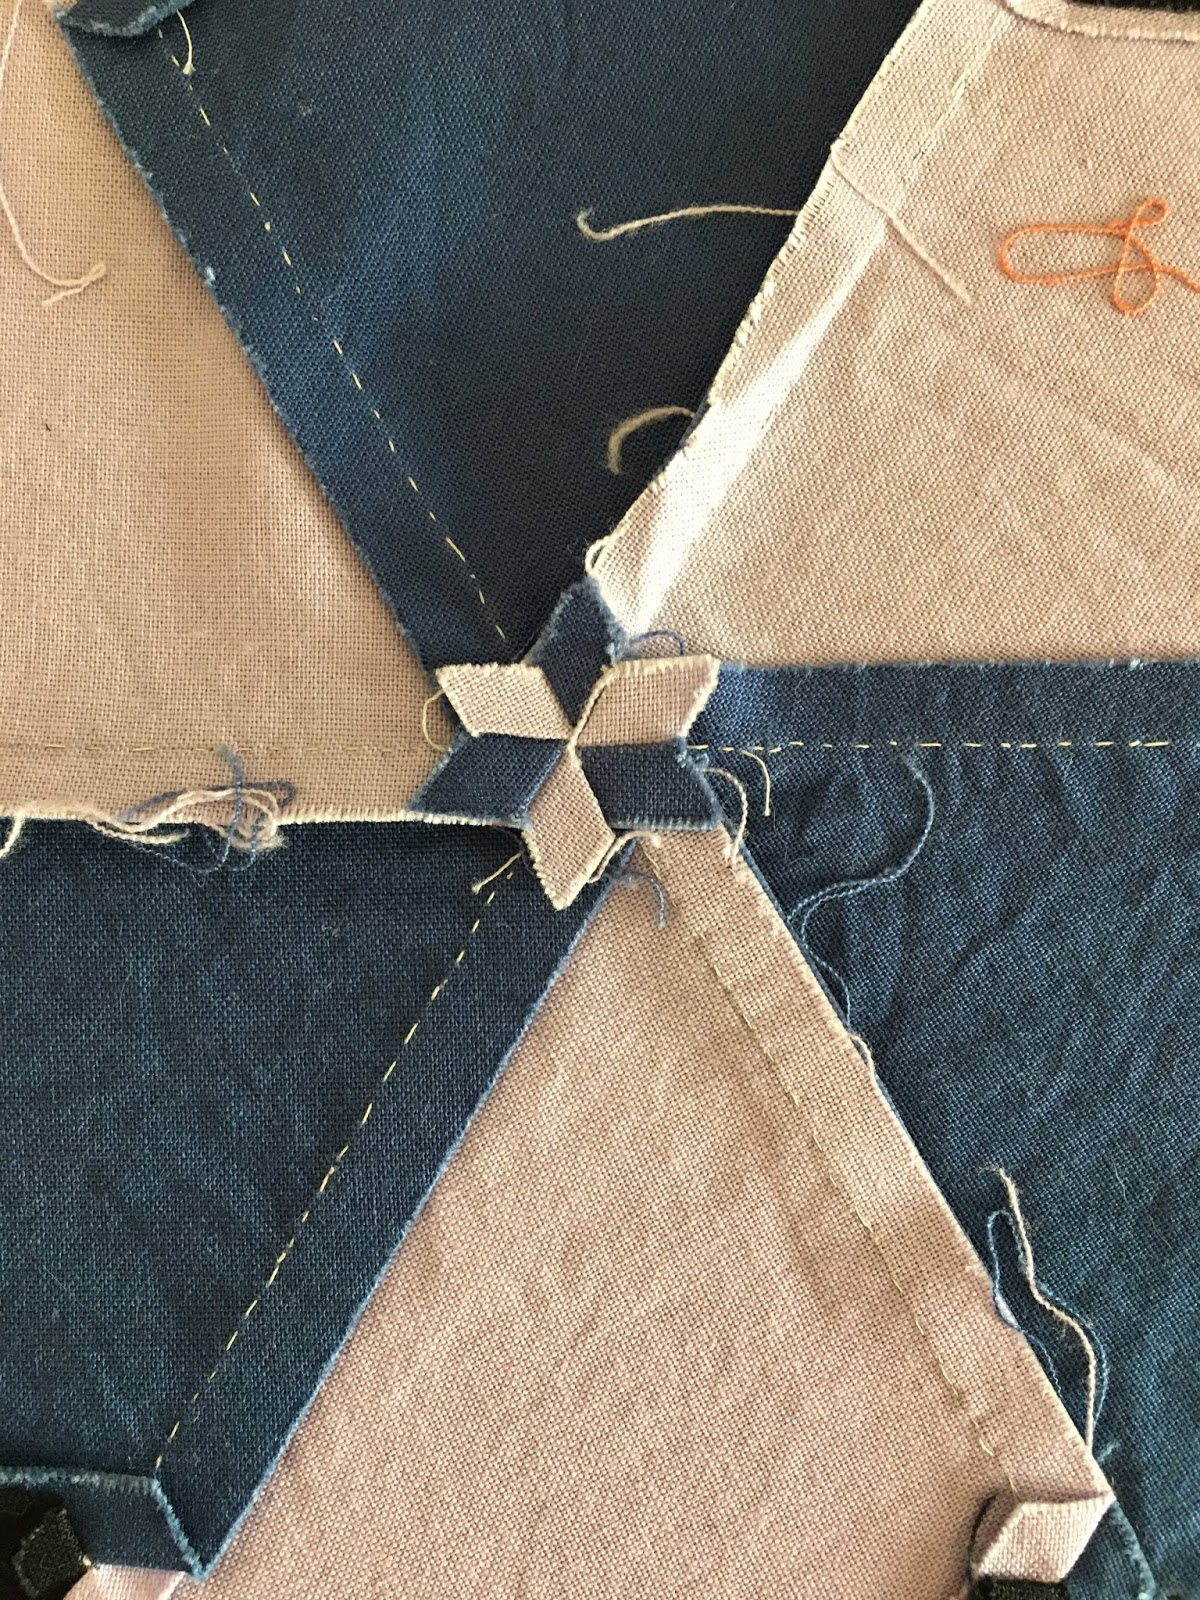
Two hours of pressing resulted in every seam spinning and laying nice and FLAT.  That's the beauty of hand piecing.  You can manipulate your seams. For this reason,  I never press hand pieced units until they are all together.

Oh, the sweet satisfaction of my star centers!

So what's so great about the Color Collective?  Let me show you.  Here is my own selection of solids that I've accumulated over the years.  Notice how many greens, creams, and cheddars to browns I have?


Here are the untouched bundles of the selections that Tara curated for Season 1 and 2.  Notice all the berries, limes, aquas and purples?  Yup, she pushed me over the edge of my color box.  I have worked with combinations I would never have chosen, and making decisions based on a selection of colors chosen by someone else is quite freeing.  The patterns are definitely aligned with working with solids and you have to up your game as every seam shows. 

I have done hand pieced 6 pointed stars before, so this technique was not new to me.  Making all the centers as good as I could mattered when working with solids.  This series was about was trying new color combos, learning new techniques (as I have with many of the other monthly patterns), and stretching my boundaries.   I've done 2 series, they have a private FB page, video demos, FB chats, IG chats and the pricing is excellent.  Plus members get a discount for the 6 months on any other purchases from Sewtopia.  If you are not familiar with Tara's work, check out her patterns.  They are clearly written, great line drawings and her social media is a wealth of inspiration.

This piece finished at 62 x 64.  When oriented this way, it can look more like Tumbling Blocks.  Any way you look at it, I think it's fantastic.  Once it's quilted, I will trim back the top and bottom edges, I used pre made stars along the border, ones that were extras that didn't make the cut for the center.  Black batting will be used and I am going to hand quilt it.  (who know when!)

Keep stitching,
Sharon

Sunday, January 19, 2020

Swapping Stars

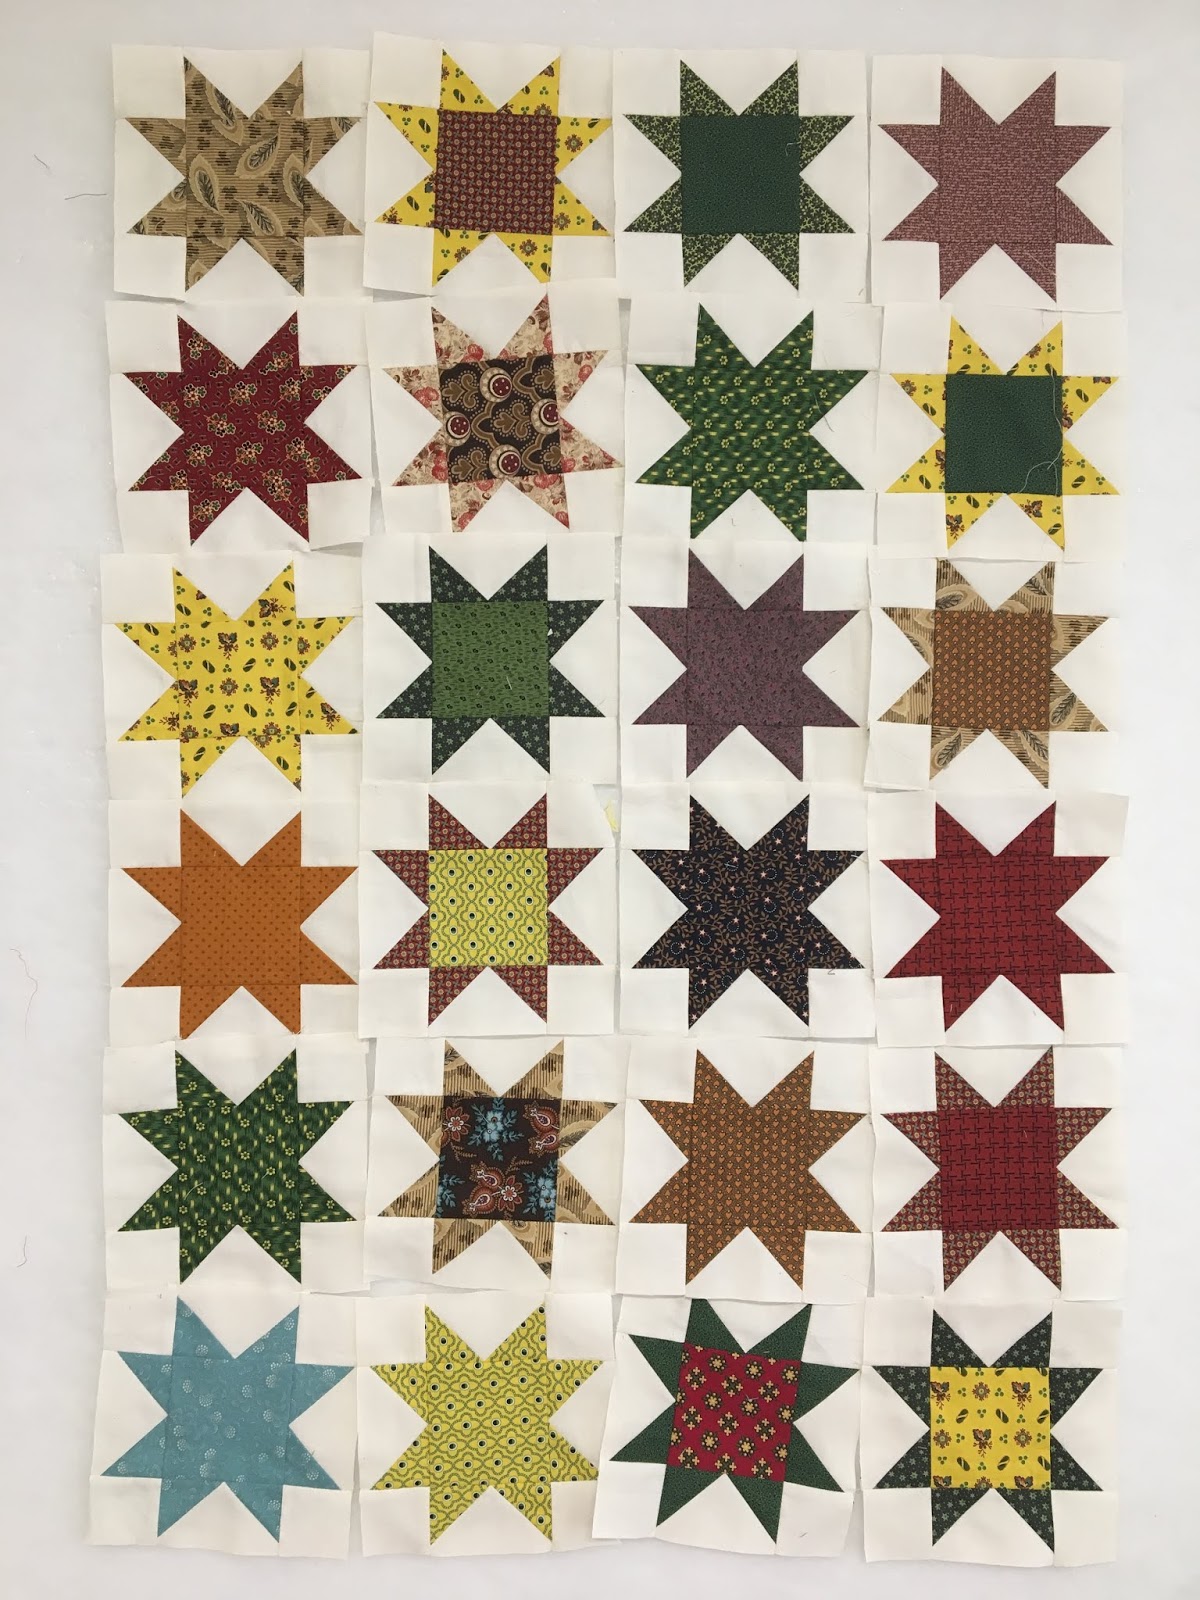
Another great swap in in the works.  Barb, from Fun with Barb hosts swaps every so often and I always try to join in.  This time was no exception, even though I knew I would be under some pressure to hit the deadline.  I signed up for making 40 blocks using 1800's reproductions prints.  Here is a sampling of my stars. 

This piece has been in my stash since 2004.  I bought yards of this when I came to the US.  I didn't know anything about 1800s reproduction fabrics, but I was drawn to them immediately. I used this for curtains in my first place here.

Barb sends out very clear instructions and parameters for her swap and that is why I love doing them.  I trust the workmanship of the participants and know that I will be getting back good blocks.
In the process of making my stars, I dug through a bag of these.  Over 100 - 6 1/2" churn dash blocks from a previous swap. 
They have been patiently waiting to become a quilt top.  I've started adding sashing on one side of each block and I have the fabric for the corner posts.

thank goodness I've started adding notes to my boxes, and bags of projects.  That is a game changer when you get back into something from over a year ago.  Counts are there, color notes, cutting measurements, etc
I only had to make 29 more blocks, per my notes.  Since I had out scraps of muslin and a variety of reproduction prints were stacked up on the cutting table, I got busy moving this project forward a little bit.
Now that I have all the blocks made, a pile of muslin scraps folded up in the bag, a few sketches of ideas, this will be a perfect project to take to retreat at the end of the month.  Lets hope I don't take this long to put the star swap blocks into a top.
Keep stitching,
Sharon


Wednesday, May 2, 2018

Traveling EPP Stars

My EPP (english paper piecing) project had been completed.  Sleeve and all!  I thought I'd share the details here.   Maybe I will inspire someone to pull out an old project they pushed to the side, or take on a brand new piece. 
I'm often asked "how do you get so much done?" and that always seems to catch me off guard.  I guess when quilting is your job, and I follow along so many fantastic designers, piecers, appliquers, and longarm quilters, I can sometimes feel like I never get anything done.  That is why there is a statement that says, "Comparison is the Thief of JOY"


But enough of that.  Here are some of my tricks and tips on getting things finished.  Make sure you always have those hand work projects ready to go at a moments notice.  This piece traveled from WA to AZ to HI to NY to ON Canada and back to WA.  It also when to doctors appointments, the Friday night Street Legal Drags (yup, my guy is a car guy), and trips into town 20 minutes away.  I think you get my point.  It's very portable and easy to poke away at. The whole piece is hand stitched, from the basting to the piecing.


Here are my pieces in a hotel in downtown Buffalo, NY


When I finally had the stars all together with the setting fabric, I could put my rows together. Staying organized is very easy now with our smart phones.  A few quick pictures and you have captured your layout.


Once I had the center together, I could finalize the colors for the outside edges.  Plus I wanted to use the 1/2 diamonds for the side pieces and they were on order.

Close up finished edges.


Corner edges still with paper in behind them.  I am a thread baster when it comes to EPP.  I've tried fighting working with glue sticks, and for the record, the glue stick won.  So I continue to baste with hand quilting thread.  It does require a bit of time to pull out the threads, but I am pleased with my results so I stick to my method of choice.  Chocolate and vanilla, right?


Once I removed all the papers and got to the outside edges, I finished the process at the ironing board.   As I removed the papers, I gave the outside edge a quick spray of sizing and pressed with a hot iron.  Remember, I said pressed, not ironed.  You really want to make sure it's an up and down motion, not back and forth.  The edges are bias and I wanted to take care to keep a straight edge. 

I did one side at a time.  After it was pressed, I took it to my machine and did a line of stay stitching about an 1/8" from the raw edge.  This does two things.  It stabilized the bias edges, and keeps the seams from popping apart.


Once it was ready to quilt, I decided to quilt it with the KISS method.  Keep it Simple  Straight lines using a beige/cream So Fine thread did the trick. I also kept the binding narrow, and this is a single fold that started at 1 1/4"

Texture.....
Detail...........

Back and binding.  I used a wonderful Barbara Brackman print that I've been hoarding saving.

Another question I'm regularly asked, "How do I get my string fabric for my quilts?"   Easy, I save the trimmings.

See the thread line below?  Cut off the edge where there's stitching from the quilting process and pull the batting off.

And throw it into your strip basket.  That's one of many ways I accumulate various sized strips for later use.


Here are the details of the finished project.
13 rows
7 full stars
6 full 2 1/2 stars
49 stars + 36 stars (510 diamonds) + 12 1/2 stars (24 diamonds + 24 1/2 diamonds)
280 full background diamonds
14 1/2 BG diamonds
16 1/2 diamond triangles
814 diamonds
38 1/2 diamonds
14 triangles
866 total pieces
26.5 x 44.5 finished
Hobbs 80/20 batting
Straight line stitching
single fold binding cut at 1 1/4"

And yes, I've started another portable project.  This next one is 1" hexi's, 7 per block, 1" equilateral triangles as setting pieces, 12 per block, and 3" equilateral triangles as the joining piece for each block.  I estimate I might have that top finished by Dec of 2019.  I'll enjoy the journey!

Keep stitching,
Sharon

Wednesday, March 7, 2018

Perfect Timing

This is my second go round with this bag of fabric.  It's now Great Grandpa's shirts that are going to be used to create a baby quilt.

Yellow was the color of choice for the background color, and I got to use a stack of different shades of yellow.  This commissioned piece had a due date of April 1, but I knew the baby was due mid March.

So I got out my trusty tools, and my Sisters quilt show coffee mug and got busy.


When making this type of quilt, I focus on the blocks and color choices first.  I figure I will figure out how it all will work after I get the majority of the blocks pieced.
I put the finished blocks up on the wall, assess the open spaces

and then start the math.

Once I get this far, I just have to make the last few blocks in the correct sizes/colors to fill in the holes.

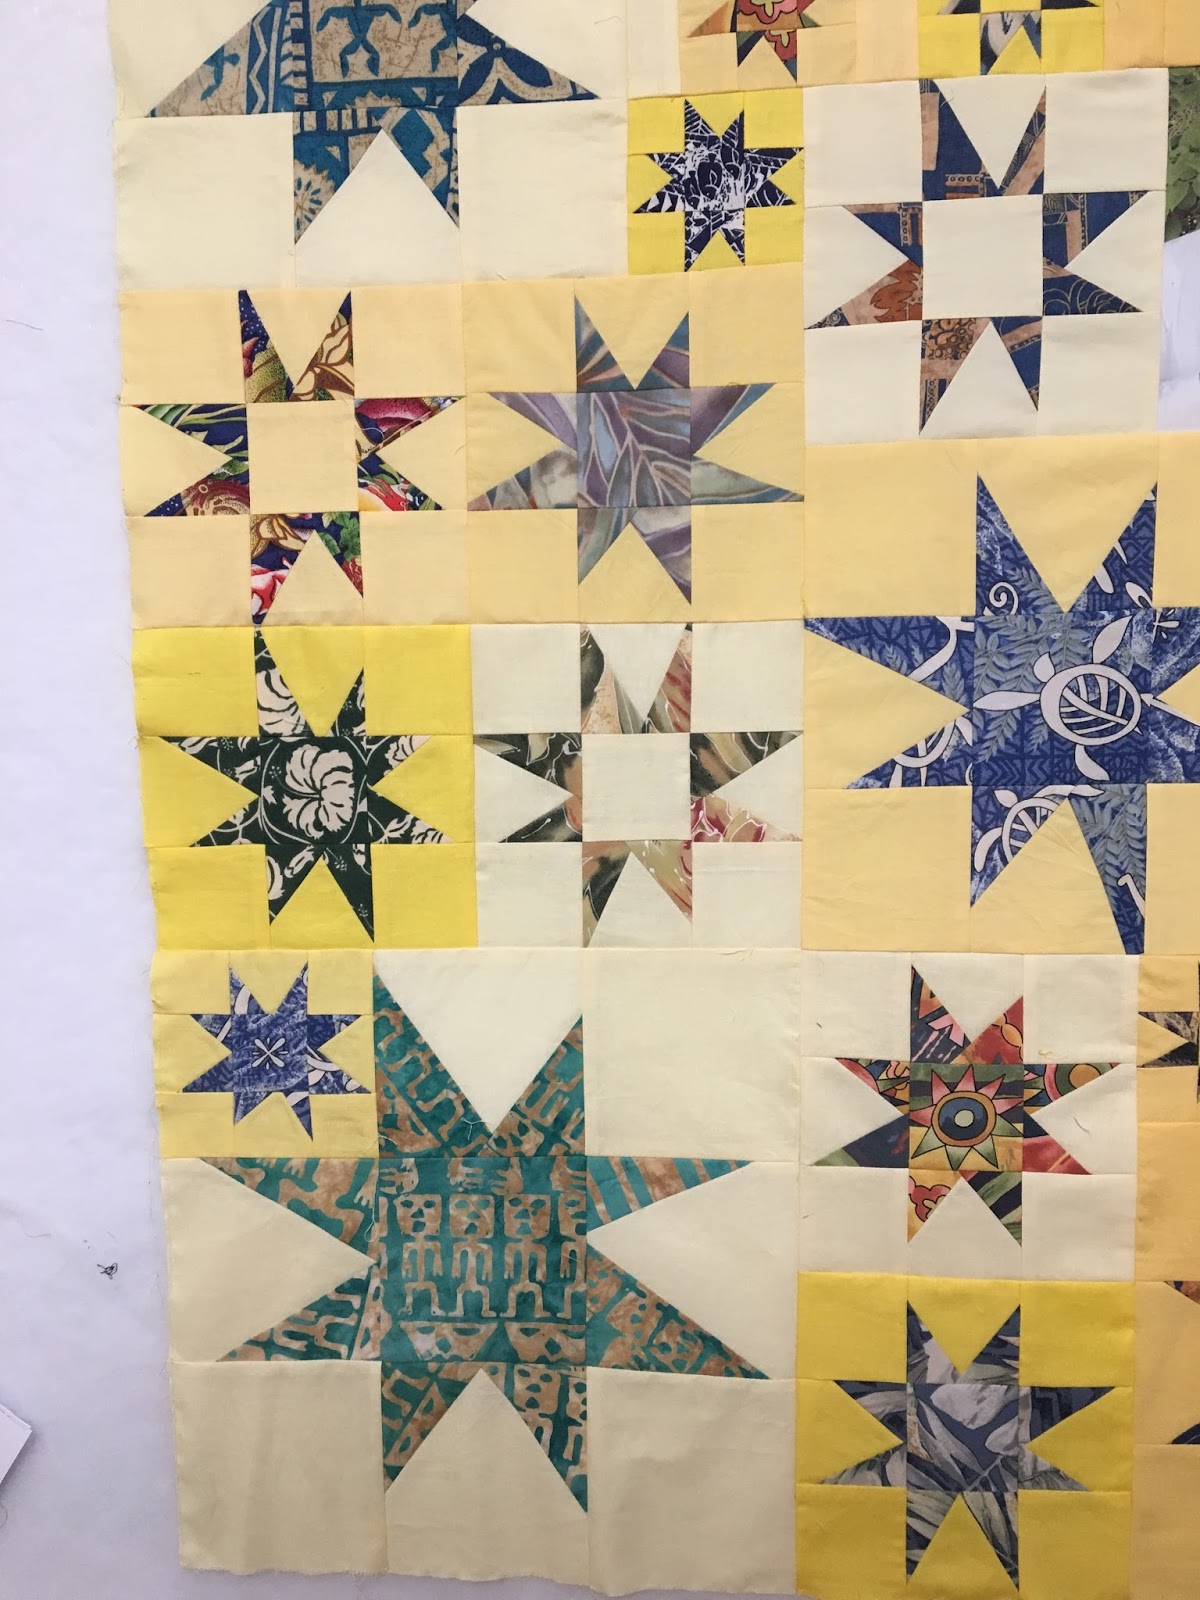
Then the next part of the math happens.  The part where I have to figure out how to sew the blocks together to make a rectangle.  Half seams are my best friend and I love the final look when I use the half seams.  No straight seams, no columns or rows.  Makes for a very interesting finished top.

The dark lines are my road map to piecing the top.  I work in sections, and then work the sections together.


Can you spot the filler strips?  Faster than making a third small star block, plus it adds interest.

The small star block is inset by using half seams.

No direct line top to bottom or across the quilt top.

Here is the finished piece.  All the stars are made with Great Grandpa's Hawaiian shirts.

The quilt got finished last week, way ahead of my promised date of April 1.

When I contacted my client, she was so excited to hear that I was finished.  Mom was at the hospital, and had the baby that day!
I'd say that was perfect timing!
Now I have to get busy on the next project.

Keep stitching,
Sharon