String Flowers started to come together in a Gwen Marston workshop and ended up being published in American Patchwork and Quilting. This class was titled as Strings, so I didn't bother to read any the the class supply/info list and showed up with my string patches, an idea and Gwens String book. I knew Gwen would give me "hands on" instructions/inspiration, and I couldn't wait to get started. With her guidance this was the end result. This version was hand appliqued and hand and machine quilted.
None of the string petals are stitched to a foundation. I strung together enough fabric to cut out my petal shape and appliqued them down. If you look closely, you will notice I cobbled together different greens for the leaves. The stems are all going in different directions, the leaves placed in various positions. The fun of working this way is that you don't make 4 identical blocks, but you make something that is creative, and uniquely your own design.
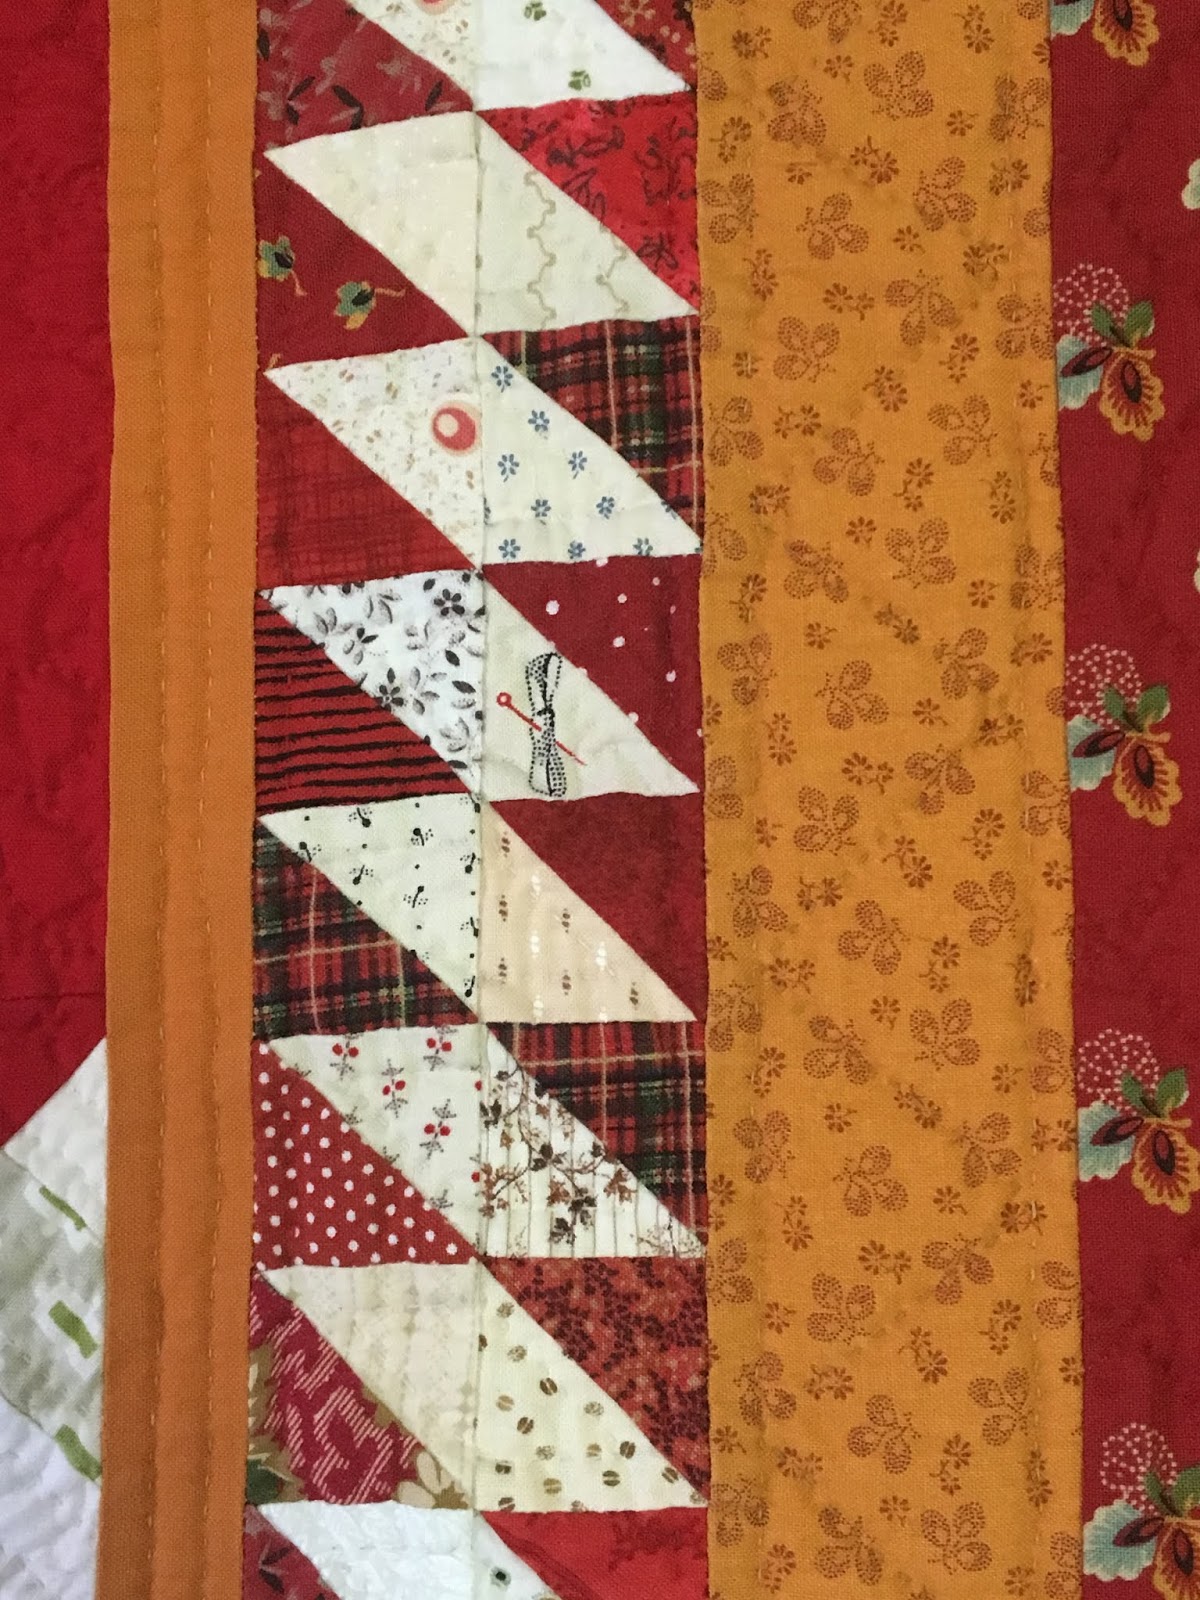
It turned out that the class required yardage! Oh well, I was able to make a few sample blocks to take home and play around with the class technique. I ended up using the class technique that Gwen taught as the outer border for this second color version.
Here is my second version that was machine appliqued. I also faced this piece. Instead of appliqued leaves, I used a 12 wt thread matching the stem and
did some big stitch embellishment. Notice that I machine quilted right
over the big stitch. The stems were machine stitched along the edge
while the petals were machine sewn with a blanket stitch. The flower
petals were hand quilted to add a bit more texture.
I tried out some new to me tape. 3M Scotch brand green tape for ROUGH SURFACES. It's a painters tape, but I was able to stick quilts to a concrete wall and the side of our condo. I tucked this in behind a blooming rhododendron. It was vibrating with so many bumble bees buzzing in and out of each blossom.
So many bees that it was quite easy to get this photo.
The link to another version and the pattern is at the beginning of this post. Here is APQ's second colorway that they showed.
So get buzzing and string a few patches together to create your own string flower garden. There are no rules, just guidelines and ideas when working with strings. If you string your favorite fabrics together, cut shapes you like, then the quilt will be your unique creation. Just have fun.
Keep stitching,
Sharon
Showing posts with label strings. Show all posts
Friday, May 29, 2020
Thursday, May 21, 2020
Step by Step String Block
I've been asked how to make the string blocks that I used in my Zig Zag quilt I showed last week. Photo step by step as follows. Here is the finished block.
Choose what size you want your block to be and cut your solid square that size. It can be any size as long as they are all the same.
Mark a line 1/4" away from "corner to corner" as your guide for your first strip.
Now your base is ready to go. Notice the line is NOT corner to corner, it is offset by the 1/4"
Take your first strip and lay the raw edge even with your DRAWN line. Make sure the strip extends over the block on each end.
Stitch using your usual 1/4" seam allowance and this will start your string side of the block.
Press over the stitched seam and your corners should be covered by the strip. Your strip will overhang the edges. DO NOT TRIM.
Put your next strip down, RST, and line up the edges. Stitch with 1/4" and flip it over.
Pick your next strip and repeat. DO NOT TRIM any of the overhang. You will do that at the end.
I dug through my scrap bin for a triangle shape for the last piece. Make sure that last piece overs the whole foundation fabric. Remember that you will be sewing your blocks together so having thin strips right to the corner can make for bulky seams when you join the blocks.
Here is my finished block with all the strips stitched down. I do press with an iron along the way, and I don't worry if my strip is not exactly straight. A little wonky adds to the charm of strip piecing.
Flip your block over and use the base as your guideline for trimming.
Using your ruler, trim the overhanging strings right to the edge of your base.
Both sides are now trimmed,
Flip your block over and admire your new string block. It's that easy!
The bigger the base, the more strips you will need. Make your strips various widths for interest. Set the blocks in any pattern that uses 1/2 square triangles. I have used different blacks in my piece. I do think it's best to stick with one color for the base block, but using shades and tones of the same color can add some interest. Be careful though, these blocks are like pototoe chips, you can't just make a few!
Keep stitching,
Sharon
Choose what size you want your block to be and cut your solid square that size. It can be any size as long as they are all the same.
Mark a line 1/4" away from "corner to corner" as your guide for your first strip.
Now your base is ready to go. Notice the line is NOT corner to corner, it is offset by the 1/4"
Take your first strip and lay the raw edge even with your DRAWN line. Make sure the strip extends over the block on each end.
Stitch using your usual 1/4" seam allowance and this will start your string side of the block.
Press over the stitched seam and your corners should be covered by the strip. Your strip will overhang the edges. DO NOT TRIM.
Put your next strip down, RST, and line up the edges. Stitch with 1/4" and flip it over.
Pick your next strip and repeat. DO NOT TRIM any of the overhang. You will do that at the end.
I dug through my scrap bin for a triangle shape for the last piece. Make sure that last piece overs the whole foundation fabric. Remember that you will be sewing your blocks together so having thin strips right to the corner can make for bulky seams when you join the blocks.
Here is my finished block with all the strips stitched down. I do press with an iron along the way, and I don't worry if my strip is not exactly straight. A little wonky adds to the charm of strip piecing.
Flip your block over and use the base as your guideline for trimming.
Using your ruler, trim the overhanging strings right to the edge of your base.
Both sides are now trimmed,
Flip your block over and admire your new string block. It's that easy!
The bigger the base, the more strips you will need. Make your strips various widths for interest. Set the blocks in any pattern that uses 1/2 square triangles. I have used different blacks in my piece. I do think it's best to stick with one color for the base block, but using shades and tones of the same color can add some interest. Be careful though, these blocks are like pototoe chips, you can't just make a few!
Keep stitching,
Sharon
Wednesday, May 13, 2020
Zig Zag Strings
My zig zag quilt has been shared before, but I'm going to be posting about each of my string quilts over the next few weeks. First off, I LOVE this and wish I had stayed the course and made this into a king size quilt. Yes, you heard me, KING.
My love for 1800's reproduction fabrics had consistently been met with "Civil War prints are soooo drab." I've learned a few things about this over the last few years. I now refer to these prints as 1800's reproductions since the Civil War time frame is only about 15 years. 1800's reproduction prints and designs span 100 years, so there is plenty to pick from. I do gravitate to the brighter side of things and this piece showcases many of the scraps in my sewing studio.
Did you notice that the blacks are not the same? It was a great way to use up those smaller, random solids of black that seem to kick around the studio. Not enough for a whole quilt, but too big for the scrap bin. The method I used for this is the "stitch and flip" method so the black fabric is the base behind all the strings. I start with a bigger block and then trim down after the strips are sewn down. After that, they are simply a 1/2 square triangle and you can have a lot of fun arranging them on your design wall.
I do love a good zig zag! And use your favorite fabrics. If you don't have a long enough strip, just add onto it. They don't even have to be the same color. You can see I have cobbled together two strips to make this block.
This is a fun and relaxing way to stitch up some blocks, and burn through some of the boxes, bags or bins of left overs that seem to multiply overnight.
The best part of working with strings is that you don't have fuss and it doesn't take much concentration; something I seem to be lacking these days.
Keep stitching,
Sharon
My love for 1800's reproduction fabrics had consistently been met with "Civil War prints are soooo drab." I've learned a few things about this over the last few years. I now refer to these prints as 1800's reproductions since the Civil War time frame is only about 15 years. 1800's reproduction prints and designs span 100 years, so there is plenty to pick from. I do gravitate to the brighter side of things and this piece showcases many of the scraps in my sewing studio.
Did you notice that the blacks are not the same? It was a great way to use up those smaller, random solids of black that seem to kick around the studio. Not enough for a whole quilt, but too big for the scrap bin. The method I used for this is the "stitch and flip" method so the black fabric is the base behind all the strings. I start with a bigger block and then trim down after the strips are sewn down. After that, they are simply a 1/2 square triangle and you can have a lot of fun arranging them on your design wall.
I do love a good zig zag! And use your favorite fabrics. If you don't have a long enough strip, just add onto it. They don't even have to be the same color. You can see I have cobbled together two strips to make this block.
This is a fun and relaxing way to stitch up some blocks, and burn through some of the boxes, bags or bins of left overs that seem to multiply overnight.
The best part of working with strings is that you don't have fuss and it doesn't take much concentration; something I seem to be lacking these days.
Keep stitching,
Sharon
Friday, May 8, 2020
String Stars
Everything I love about quilts and quilting are in this string star piece. It was made in 2013 with the help of the amazing Gwen Marston during a retreat on Lopez Island.
It contains strings
It was created using Gwen's liberated star techniques.
The cheddar border bleeds into the corner blocks for a unique look, and that is a result of "using what you have".
It's hand quilted and has feathers in the solid red areas.
The diamond border is all half square triangles that were bonus blocks from a Bonnie Hunter Mystery quilt. And no matter how hard I try to keep prints away from each other, this usually happens. Really?? 3 plaids so close together??
The outside print gave me a grid for the border hand quilting.
It's red and cheddar and we all know "cheddar makes it better".
I hope you get out for some activity and fresh air this weekend.
Sharon
It contains strings
It was created using Gwen's liberated star techniques.
The cheddar border bleeds into the corner blocks for a unique look, and that is a result of "using what you have".
It's hand quilted and has feathers in the solid red areas.
The diamond border is all half square triangles that were bonus blocks from a Bonnie Hunter Mystery quilt. And no matter how hard I try to keep prints away from each other, this usually happens. Really?? 3 plaids so close together??
The outside print gave me a grid for the border hand quilting.
It's red and cheddar and we all know "cheddar makes it better".
I hope you get out for some activity and fresh air this weekend.
Sharon
Friday, August 3, 2018
Wild Flowers - String Applique
This piece has been under wraps for a very long time and I'm excited to finally share it with everyone. I started this piece in a Gwen Marston string workshop. I didn't read the supply list so when she put up a sample to show what we were making, I was caught off guard. I assumed we would be doing a free wheeling day of string sewing and cutting and piecing. Since I brought my intended project, Gwen was gracious enough to help. However, when I asked her to explain how she pieced her string flowers, she laughed and said "I didn't!" Whoa, what ??? It's in her string book that I had with me. I opened it up, went to the page and sure enough, she gave you the outline and suggested how it "could" be done. I shared my ideas/methods, moved forward and then Gwen taught me the value of a circle. Thank you, Gwen. You have pushed me far beyond my self imposed boundaries, and I am ever so grateful for that!
American Patchwork & Quilting October 2018 issue is hitting your mail box now, and the issue will be on the stands August 6th. I'm always thrilled to be part of this publication, and yet again, they have put together a stellar line up of projects for the fall.
WILD FLOWERS - pg 82
This is a staged photo I took in my back yard a few years ago. I loved using the old wooden fence, the vintage wagon wheels and whatever vegetation was growing. I miss that fence!
Here is the cover so you can easily spot this issue on the news stands.
My first version was needle turn appliqued and this one was done on the machine, using variegated threads. The magazine wrote the pattern using Machine Applique methods.
I'd love to teach this to your group or guild. My method of string pieced needle turn applique is super simple. I will share techniques that transfer to any string shapes and I'd love to share it. Book a trunk show and workshop that focuses on string piecing, have some fun and learn a new technique!
And as always, keep stitching!
Sharon
American Patchwork & Quilting October 2018 issue is hitting your mail box now, and the issue will be on the stands August 6th. I'm always thrilled to be part of this publication, and yet again, they have put together a stellar line up of projects for the fall.
WILD FLOWERS - pg 82
Used with permission from American Patchwork & Quilting® magazine. ©2018 Meredith Corporation. All rights reserved.
Enlarge this one to see the quilting details. I did ruler work behind the flowers, and then did a checker board around the border for some interest. This was my first attempt at that border treatment, (I always practice on my own work first!)
Used with permission from American Patchwork & Quilting® magazine. ©2018 Meredith Corporation. All rights reserved.
Here is the pattern tester, Vicki Hoth's, version. I love how they quilted the background and the string piecing. Super cute in the soft colors.
Used with permission from American Patchwork & Quilting® magazine. ©2018 Meredith Corporation. All rights reserved.
This is a staged photo I took in my back yard a few years ago. I loved using the old wooden fence, the vintage wagon wheels and whatever vegetation was growing. I miss that fence!
Here is the cover so you can easily spot this issue on the news stands.
Used with permission from American Patchwork & Quilting® magazine. ©2018 Meredith Corporation. All rights reserved.
And here is my second version. I used a string inset pieced border and went with bright pinks.
I didn't want to make it "the same" so instead of appliqueing leaves, I used green perl cotton and did a big stitch outline of a leaf. My first version was needle turn appliqued and this one was done on the machine, using variegated threads. The magazine wrote the pattern using Machine Applique methods.
I'd love to teach this to your group or guild. My method of string pieced needle turn applique is super simple. I will share techniques that transfer to any string shapes and I'd love to share it. Book a trunk show and workshop that focuses on string piecing, have some fun and learn a new technique!
And as always, keep stitching!
Sharon
Sunday, July 16, 2017
Bag Quilts
I'm sure you all have a few of these. Projects started and discarded, when the mojo ran out, that have been stored in a bag. It gets moved from here to there to over there and back to here again. Part of my commitment to myself and to my sewing room was to not "shelve" these bags, so they sat on the floor, lined up in front of my design wall.
The Batik bag actually made it's way to the "donate" bag. Then I had someone come over and I offered to give them the batiks, which prompted a sift and search mission into the bag. I quickly realized I needed to do this in private, called off the search and said I would bring them to our next stitch meeting. The scraps got dumped onto my table and I realized that in with the scraps of fabric, I had stacks of blocks that were left overs from another project.
I sewed the blocks together, shopped for the stop border, then continued cutting and sewing the scraps into a string border. I dug out one of Gwen Marstons books and set out to make the corner blocks. I need a bit more practice to be really pleased with the results, but for a baby quilt, they turned out perfect.
It has now been quilted, the binding is attached and just needs stitched to the back. Yes, I still do this by hand, even for baby quilts. It's my favorite part of making a quilt, the last time you get to sit and stitch on it, look at the fabrics, techniques, think about who is going to receive the quilt.....
This was quilted using Silk batting by Hobbs. First time for me, and since it's (hopefully) going to be well used, the quilting was quite dense, just in case the batting decides to react to the washing and use of the piece.
Two left over chunks of cozy flannel were released from my stash, and voila, I now have a finished quilt to gift out and one less bag in my studio. Sorry to my stitching buddy, I used up every last scrap of the batiks that were in this bag.
Bag #2 Yellows and greys from a previous project. At some point I got the crazy idea (it might have come from Victoria at VFW Quilts) that I could sew all the bits and pieces together and "make" fabric. Good grief, like I need to make my own; I've got baskets full of fabric made by perfectly good fabric mills!
I started making some liberated stars out of this 'made' fabric. What was I thinking? Oh, right, I wasn't thinking!
Then the 'made' fabric became the star points, and then it all got dumped back into 'the bag'.
Here is the beginning of the sort. Just trying to figure out what I had was a challenge and made me think a few times about putting this back into a bag, one that would head to the dumpster after it got filled up. But I persevered.
The funny thing about this was that the only fabrics I had in all my 24 bins was solid yellow or white on whites to mix into this pile of scraps. I did not have one grey or printed yellow piece that I could add into this creation. Hmmm
The end result of this bag of scraps is this very cute and sunny Liberated Star quilt. It measures approx 36" x 42" There is no rhyme or reason to this. Blocks were made to 'fill in the spaces' and trust me when I say this is a One of a Kind. I couldn't even replicate this if I tried. And I won't.
It needs a good pressing, but it's flat, straight, and square (rectangle) but you know what I mean.
A few filler strips were added
Partial seams were my best friend when putting this all together.
And some of the blocks are a very funky size. That's the beauty of Liberated, you can work out those variables, and no one notices. When this was all finished, I folded up the yellow solids, and the handful of scraps that was left, yes, handful, went into the garbage.
This last one I'm showing has been pieced, layered, basted and partially quilted.....for years. I'm finally getting back to it as I've now got the sashing motif settled in my brain. I do love a good sampler, and I think this one fits that bill.
Yes, it's slow going when you decide to tackle these long gone projects. We need the mojo, the excitement of the start, the something new. I do too, but I thought that if I kept moving and shelving these bags, they would never be used and that, my quilter friends, would be a shame. The batik one will be gifted as soon as the binding is done, maybe even tonight. (if I get away from the pc). So I challenge you, pull out just one of these bags, and poke away at it. The rewards are a finished piece, and more room on the shelf for the nextabandoned shelved project.
Next post, boxed quilts..........
Keep stitching,
Sharon
The Batik bag actually made it's way to the "donate" bag. Then I had someone come over and I offered to give them the batiks, which prompted a sift and search mission into the bag. I quickly realized I needed to do this in private, called off the search and said I would bring them to our next stitch meeting. The scraps got dumped onto my table and I realized that in with the scraps of fabric, I had stacks of blocks that were left overs from another project.
I sewed the blocks together, shopped for the stop border, then continued cutting and sewing the scraps into a string border. I dug out one of Gwen Marstons books and set out to make the corner blocks. I need a bit more practice to be really pleased with the results, but for a baby quilt, they turned out perfect.
It has now been quilted, the binding is attached and just needs stitched to the back. Yes, I still do this by hand, even for baby quilts. It's my favorite part of making a quilt, the last time you get to sit and stitch on it, look at the fabrics, techniques, think about who is going to receive the quilt.....
This was quilted using Silk batting by Hobbs. First time for me, and since it's (hopefully) going to be well used, the quilting was quite dense, just in case the batting decides to react to the washing and use of the piece.
Two left over chunks of cozy flannel were released from my stash, and voila, I now have a finished quilt to gift out and one less bag in my studio. Sorry to my stitching buddy, I used up every last scrap of the batiks that were in this bag.
Bag #2 Yellows and greys from a previous project. At some point I got the crazy idea (it might have come from Victoria at VFW Quilts) that I could sew all the bits and pieces together and "make" fabric. Good grief, like I need to make my own; I've got baskets full of fabric made by perfectly good fabric mills!
I started making some liberated stars out of this 'made' fabric. What was I thinking? Oh, right, I wasn't thinking!
Then the 'made' fabric became the star points, and then it all got dumped back into 'the bag'.
Here is the beginning of the sort. Just trying to figure out what I had was a challenge and made me think a few times about putting this back into a bag, one that would head to the dumpster after it got filled up. But I persevered.
The funny thing about this was that the only fabrics I had in all my 24 bins was solid yellow or white on whites to mix into this pile of scraps. I did not have one grey or printed yellow piece that I could add into this creation. Hmmm
The end result of this bag of scraps is this very cute and sunny Liberated Star quilt. It measures approx 36" x 42" There is no rhyme or reason to this. Blocks were made to 'fill in the spaces' and trust me when I say this is a One of a Kind. I couldn't even replicate this if I tried. And I won't.
It needs a good pressing, but it's flat, straight, and square (rectangle) but you know what I mean.
A few filler strips were added
Partial seams were my best friend when putting this all together.
And some of the blocks are a very funky size. That's the beauty of Liberated, you can work out those variables, and no one notices. When this was all finished, I folded up the yellow solids, and the handful of scraps that was left, yes, handful, went into the garbage.
This last one I'm showing has been pieced, layered, basted and partially quilted.....for years. I'm finally getting back to it as I've now got the sashing motif settled in my brain. I do love a good sampler, and I think this one fits that bill.
Yes, it's slow going when you decide to tackle these long gone projects. We need the mojo, the excitement of the start, the something new. I do too, but I thought that if I kept moving and shelving these bags, they would never be used and that, my quilter friends, would be a shame. The batik one will be gifted as soon as the binding is done, maybe even tonight. (if I get away from the pc). So I challenge you, pull out just one of these bags, and poke away at it. The rewards are a finished piece, and more room on the shelf for the next
Next post, boxed quilts..........
Keep stitching,
Sharon
Subscribe to:
Posts (Atom)