December it the time of year I get excited about starting new Christmas projects and always say they are for next year. I enjoy working on something of the season and so I did some red work stitching during my vacation the beginning of December. It was all hands on deck once I returned, getting all the customer quilts quilted and back to them in time to bind and gift out on the 25th. I had decided if quilts weren't required for Christmas, then I would take the few days between the 25th and the 1st to clean up and regroup in my studio.
December 26th: I enter the studio with clear intentions, start cleaning and work on this green scrappy pile of strips and blocks that have grown roots beside my machine. It's JUST time to get these blocks done so I can gift out my last family quilt.
December 26, later that day:
In the clean up/pick up process, I find this pattern, border strips and squares all piled together on top of my Christmas fabric drawer and I pick it up. (big mistake)
December 27th: Oh I'll just cut a few scraps and do a few corners to make the faces of these cute snowmen. No, I didn't save these tiny off cuts. Now that's just too small for me and remember, I'm cleaning up my studio and working on the green pineapple blocks.
OK, so you can see a few FG to the left. Thought I'd test out the holly print for the background.
And once I got the snowball blocks all pieced, I thought I'd see what they look like on my design wall. No time like the present to get them stitched together, right?
And while I'm at it, might as well make a few more FG blocks. I love the Elanor Burns method, it's perfect for something like this project. All the outsides are the same and the centers are scrappy.
I only needed 78, so what the heck, just get them done. A little trimming and the FG are perfect!
December 31: Well, might as well get the whole thing put together, quilted, machine sew buttons on for eyes, use some wool for the noses and a few sets of eyes. All this just adds to the quilting as they were done after it was quilted and bound. I stitched out an eye on one of the faces, just to make them individual and a little quirky.
January 8th: Stitch out the text around the inner border, using red Aurifil color 2260 in 28 wt. It's my go to red thread for any type of red work stitching.
Oh, and I did get the drawer of Christmas fabric organized, tidied up and all put away. That's what I started to do, right?
So who else worked on Christmas projects after Christmas? According to IG, I wasn't the only one. Now its back to the longarm and customer quilts for January.
Pop by later this week to see what happened to the green blocks!
Happy New Year,
Sharon
Saturday, January 9, 2016
Friday, November 6, 2015
Then and Now
It's great to look back at quilts of days gone by. I recently took some time to refold and reorganize my stack of quilts that reside in my spare room. After looking at a few of them, I decided to snap a few pictures of this one and blog about it.
This is a Blooming' 9 Patch and it came to fruition after my first visit to Sisters Outdoor Quilt Show. I went with a non quilter and after we were on quilt overload, we headed out of town to find our car parked way down the road into Sisters. I stopped to take a final glace at the town, and saw a Blooming 9 patch done up in blues. I was drawn to it like a magnet.
After pondering how this was put together, another viewer pointed out the corner and showed me how it was pieced. I was captivated by this organized chaos. We continued to our car, and headed back to the I-5 via Salem. That required a stop at Greenbaums. The doors were being locked as the last few customers left and I was 1/2 way down the block when my gf mentioned she saw the book that this blue quilt was in. I hurried back, knocked on the door and made my final purchase of the day.
I love this quilt, although I don't decorate with pink and am not really drawn to this color. Now that it's been many years, I looked at this with different eyes last week. I love how I made it go from light to dark and back to medium values, that was not planned. Here's where I would change it up, I used a gingham check after the center toile, and it lacks the movement of the rest of the fabrics. That's truly the only change I would make after all these years.
It was interesting to look at this in a new light. We evolve and our tastes change, but to still love something after moving to a whole new genre of quilting and fabrics is surprising and it makes me smile!
Keep stitching,
Sharon
#grassrootsquilting on Instagram
This is a Blooming' 9 Patch and it came to fruition after my first visit to Sisters Outdoor Quilt Show. I went with a non quilter and after we were on quilt overload, we headed out of town to find our car parked way down the road into Sisters. I stopped to take a final glace at the town, and saw a Blooming 9 patch done up in blues. I was drawn to it like a magnet.
After pondering how this was put together, another viewer pointed out the corner and showed me how it was pieced. I was captivated by this organized chaos. We continued to our car, and headed back to the I-5 via Salem. That required a stop at Greenbaums. The doors were being locked as the last few customers left and I was 1/2 way down the block when my gf mentioned she saw the book that this blue quilt was in. I hurried back, knocked on the door and made my final purchase of the day.
I love this quilt, although I don't decorate with pink and am not really drawn to this color. Now that it's been many years, I looked at this with different eyes last week. I love how I made it go from light to dark and back to medium values, that was not planned. Here's where I would change it up, I used a gingham check after the center toile, and it lacks the movement of the rest of the fabrics. That's truly the only change I would make after all these years.
It was interesting to look at this in a new light. We evolve and our tastes change, but to still love something after moving to a whole new genre of quilting and fabrics is surprising and it makes me smile!
Keep stitching,
Sharon
#grassrootsquilting on Instagram
Monday, November 2, 2015
Just Face It!
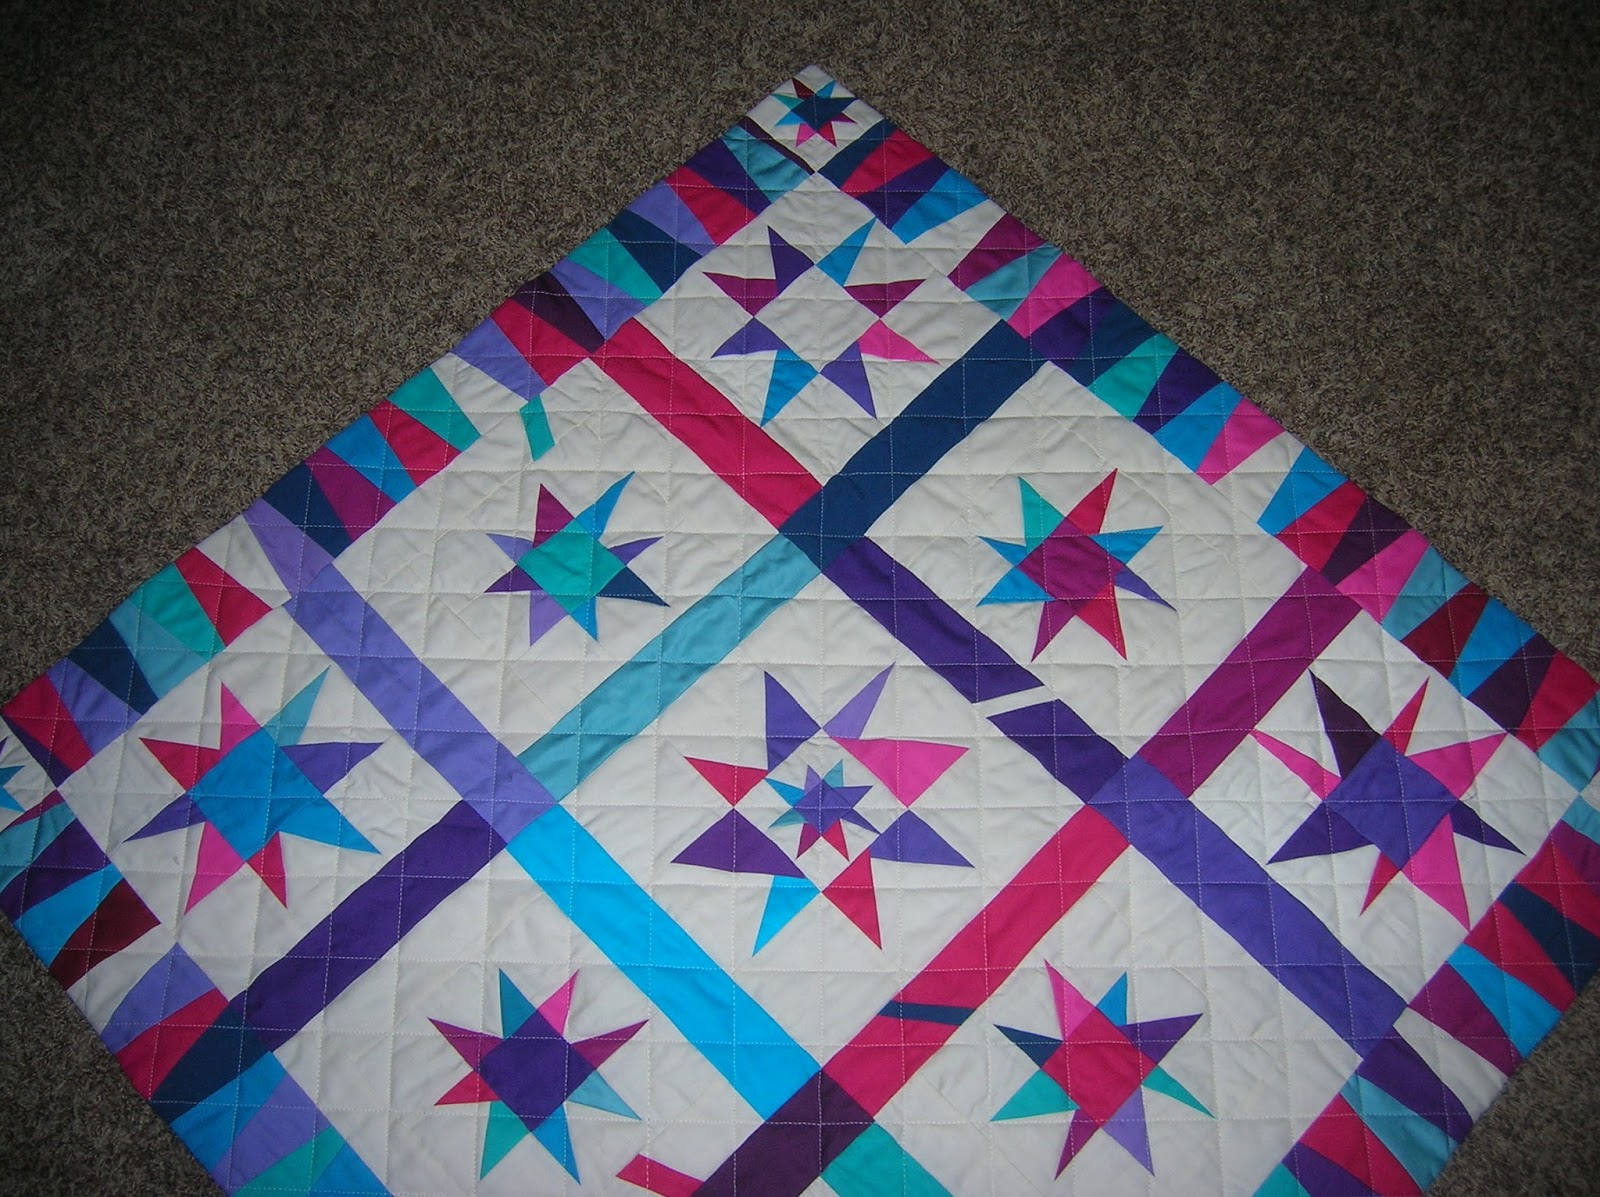
It was time to put one of my own designs onto the longarm and I wanted to cross hatch the whole piece. Not a problem except the blocks were 20" and I would have WAY to many stops and starts in the middle of open spaces. After some discussion with my gal pal about loading the quilt 'on point' and then doing the stitching straight across I decided to do a test run on a smaller piece.
I started by lining up the center of the quilt top from left to right to make sure the center row of stitching would go directly across the top, then I stitched the rows up towards the top point. After that, I rolled to the center and stitched the bottom half.
The one discovery was that I should have used a full piece of batting instead of putting the batting on point like the quilt. When I rolled the piece, it was funky. Lesson #1 learned.
After turning the quilt, I had to line up the piece so I had an exact straight line again, left to right. Lesson #2 learned. This seemed easy in theory, however there was a bit of fussing involved.
Since this was a test piece, I figured I'd keep on testing and for the first time, I faced one of my pieces. I have another piece waiting in the wings that a binding would not do it justice, so here is my first attempt at facing a quilted piece.
Lesson #3 was clipping and grading the seams in the corners to get a good turn.
It pays to have a small test piece when you want to try out new techniques. After all this, my original piece did not get cross hatched, nor did it get faced. But this piece got finished, almost by default and I call that a win! One more finish from the sewing room. Yeah for me!
Keep on stitching,
Sharon
I started by lining up the center of the quilt top from left to right to make sure the center row of stitching would go directly across the top, then I stitched the rows up towards the top point. After that, I rolled to the center and stitched the bottom half.
The one discovery was that I should have used a full piece of batting instead of putting the batting on point like the quilt. When I rolled the piece, it was funky. Lesson #1 learned.
After turning the quilt, I had to line up the piece so I had an exact straight line again, left to right. Lesson #2 learned. This seemed easy in theory, however there was a bit of fussing involved.
Since this was a test piece, I figured I'd keep on testing and for the first time, I faced one of my pieces. I have another piece waiting in the wings that a binding would not do it justice, so here is my first attempt at facing a quilted piece.
Lesson #3 was clipping and grading the seams in the corners to get a good turn.
It pays to have a small test piece when you want to try out new techniques. After all this, my original piece did not get cross hatched, nor did it get faced. But this piece got finished, almost by default and I call that a win! One more finish from the sewing room. Yeah for me!
Keep on stitching,
Sharon
Friday, October 30, 2015
Three Long Weeks
No, it's been longer than that since I last posted. Three weeks is how long it took me to do this.
Yes, this book sat on my counter for three weeks before I finally unwrapped the cellophane cover. I wanted to make sure I had the time to sit and soak up all the info at the beginning of this book. It did not disappoint.
I know others have posted about this book, but seriously, I cannot imagine a quilter not loving this book. When I think of two color quilts, immediately Red and White is what has always come to my mind. I know there are other great two color quilts, but really, this book has quilts that will give you goose bumps.
Although it's been over 4 years since the show, opening up the book brought me right back to standing in a crowded foyer at the Armories, waiting for the doors to open. And when they did, the sight literally brought tears to my eyes. I had the same emotion when I opened up this book and flipped through the pages. I have only casually pursued the photos, but saw enough to know that this book will be a go to for years to come. When I came across the page with my favorite quilt, (I know, how could you pick just one out of 653) I told my guy, "That quilt was hanging up on the back wall, I can close my eyes and see it right now." And sure enough, when I searched out the photos of the room, there it was, hanging up on the back wall!
Maybe one day I'll recreate it, but until then, I have my memories and the book!
Keep stitching,
Sharon
Yes, this book sat on my counter for three weeks before I finally unwrapped the cellophane cover. I wanted to make sure I had the time to sit and soak up all the info at the beginning of this book. It did not disappoint.
I know others have posted about this book, but seriously, I cannot imagine a quilter not loving this book. When I think of two color quilts, immediately Red and White is what has always come to my mind. I know there are other great two color quilts, but really, this book has quilts that will give you goose bumps.
Although it's been over 4 years since the show, opening up the book brought me right back to standing in a crowded foyer at the Armories, waiting for the doors to open. And when they did, the sight literally brought tears to my eyes. I had the same emotion when I opened up this book and flipped through the pages. I have only casually pursued the photos, but saw enough to know that this book will be a go to for years to come. When I came across the page with my favorite quilt, (I know, how could you pick just one out of 653) I told my guy, "That quilt was hanging up on the back wall, I can close my eyes and see it right now." And sure enough, when I searched out the photos of the room, there it was, hanging up on the back wall!
Maybe one day I'll recreate it, but until then, I have my memories and the book!
Keep stitching,
Sharon
Tuesday, September 29, 2015
The Process of...............
This is a shout out to local quilter's in the Bellingham, WA area. There has been a last minute opening in my 6 month workshop called, The Process Of...............
This came about after meeting with quilter's for 12 months during our What Not's Demo Days. Some of the members wanted to continue to meet and learn or brush up on techniques. These workshops will run the first Sat of the month for 6 months, and it's very affordable. Only $15 per month with a 6 month commitment.
During the first month we will be discussing and learning the process of drafting out blocks, changing their size, drafting out your own quilt pattern and learning how to make templates from these drawings. Before we wrap up the 2 hour class, the members will put out their wants, needs, and goals of the workshop. Those ideas will be the building blocks of the future meetings.
I am a process teacher, I want you to learn how to make good blocks, so your quilt will be flat, straight, and square (or rectangle *vbg*). The blocks you create in the workshop will all be your own choice, and at the end you will have some great pieces to put into your own original quilt or use as samples for future projects. I've done this workshop before with a commercial pattern and the feedback from quilter's was wonderful. One student emailed and told me she has never had her blocks go together so well as those from our workshop. Yeah to that !!!
OK, if you are local, come on, join in the fun. We will meet 1st Sat of the month, starting in October. Class is 10:30 - 12:30 at Fabric Etc. in Bellingham , WA. Click the link and give Carol a shout if you are interested in this great class.
Thanks,
Sharon
This came about after meeting with quilter's for 12 months during our What Not's Demo Days. Some of the members wanted to continue to meet and learn or brush up on techniques. These workshops will run the first Sat of the month for 6 months, and it's very affordable. Only $15 per month with a 6 month commitment.
During the first month we will be discussing and learning the process of drafting out blocks, changing their size, drafting out your own quilt pattern and learning how to make templates from these drawings. Before we wrap up the 2 hour class, the members will put out their wants, needs, and goals of the workshop. Those ideas will be the building blocks of the future meetings.
I am a process teacher, I want you to learn how to make good blocks, so your quilt will be flat, straight, and square (or rectangle *vbg*). The blocks you create in the workshop will all be your own choice, and at the end you will have some great pieces to put into your own original quilt or use as samples for future projects. I've done this workshop before with a commercial pattern and the feedback from quilter's was wonderful. One student emailed and told me she has never had her blocks go together so well as those from our workshop. Yeah to that !!!
OK, if you are local, come on, join in the fun. We will meet 1st Sat of the month, starting in October. Class is 10:30 - 12:30 at Fabric Etc. in Bellingham , WA. Click the link and give Carol a shout if you are interested in this great class.
Thanks,
Sharon
Sunday, August 16, 2015
BOM Struggles aka Old Voices, New Impressions
I know that BOM' s (block of the month) quilts are very popular with many people. I signed up for one early on in my quilting adventure and it's one of my favorite quilts to this day. It was not without issues, though. Then I jumped into another one several years later because it was all 30's prints and I rode the crazy train about different shades of Kona Snow. Ha, life struggles kicked in and made that a complete non issue in the roadmap of life and I did finish that top. JT2 sits in a box, gathering dust.
And yet, here I go again. Old Voices, New Impressions. Not really a BOM, more of a sew along. Make 4 blocks per month for the next 6 months, easy, right? Except I chose to make this project using the fusible machine appliqued method. This seems to generate a bit of a mess for me and once again, I realized why I do not like BOM's. I get everything out, and I just want to stay on task. If I need to make 240 flying geese for the finished project, please tell me that in the first pattern. Make 12, then 18, then another 12, well, this doesn't work for me. I'm more of a production mode kind of quilter
Here is the status of my cutting table the last few weeks! Not fun when I have to square up a customer backing for quilting.
Plus making a scrappy project means working with scraps. I dig into my scrap basket on a regular basis and this is what my sewing room looks like at any given time. Cleaning and putting everything away to take it all back out in a few weeks and repeat this cycle just does not work for me.
The first blocks were fast, very little decision making required. Select bright prints and colors and make the block. Then the hard part sets in, the last 6 or so blocks. This is when I put all the blocks up and arrange how I think they will go. 5 bird blocks so one for each corner and one for the center. I started playing with the remaining backgrounds for balance. I can't have 2 striped shirting prints side by side. I'm sure you understand this!
Then I pinned up the patterns of the remaining blocks and the decisions became harder and narrower. 4 wreath type blocks can surround the center block. 2 baskets, one for each side. Trying to balance out colors and prints meant every piece of fabric had to be vetted. Did I use that in a neighboring block? Oh, that was the bird wing, I can't make it a flower center. I used that red for berries in that block, go back and pick another red. Do I make the stems brown or green? If I use green, do I pick one with yellow, or a muted green? And so it goes on and on............
Here are all the prepped blocks on the wall. I also had to balance out that brighter background with the one darker background block. I thought about replacing them, but I think they will add some interest when it's all together and quilted.
I started playing with some sashing ideas. I have a box full of these 1/2 sq tri's from a long ago swap. Hmmm, something to ponder once all the blanket stitching has been done. The bird in the corner is my one of my favorite blocks and it might end up back in the center. It lived there for a while, but I don't have to make those decisions for some time.
Here are a few close-up shots of the blocks. Again, not much has been stitched down, that will be my winter project. As usual, click pictures for larger shots.
All the blocks have been put away. I store them on a pant hanger with a zip bag around them and that takes much less space than another box in my sewing room.
Ahhhhh, here is my basket of CW fabric with my basket of scraps. So organized and neat and tidy.
And I've reclaimed my cutting table. No more bits of fusible, light box has been tucked away, scraps and test fabrics and pieces that didn't make the cut are all cleaned up.
Thank you Lori, at Humble Quilts, for instigating this. Karen, sorry I didn't stick to the plan. I love these blocks, and I know it will be a great winter project for me. I've already picked the next quilt box to open up and get to work on. But this next one is a 2 color quilt, the blocks are made and I'm onto the setting strips. No decisions left, just the process of pinning, stitching, and pressing!
Keep on stitching,
Sharon
And yet, here I go again. Old Voices, New Impressions. Not really a BOM, more of a sew along. Make 4 blocks per month for the next 6 months, easy, right? Except I chose to make this project using the fusible machine appliqued method. This seems to generate a bit of a mess for me and once again, I realized why I do not like BOM's. I get everything out, and I just want to stay on task. If I need to make 240 flying geese for the finished project, please tell me that in the first pattern. Make 12, then 18, then another 12, well, this doesn't work for me. I'm more of a production mode kind of quilter
Here is the status of my cutting table the last few weeks! Not fun when I have to square up a customer backing for quilting.
Plus making a scrappy project means working with scraps. I dig into my scrap basket on a regular basis and this is what my sewing room looks like at any given time. Cleaning and putting everything away to take it all back out in a few weeks and repeat this cycle just does not work for me.
The first blocks were fast, very little decision making required. Select bright prints and colors and make the block. Then the hard part sets in, the last 6 or so blocks. This is when I put all the blocks up and arrange how I think they will go. 5 bird blocks so one for each corner and one for the center. I started playing with the remaining backgrounds for balance. I can't have 2 striped shirting prints side by side. I'm sure you understand this!
Then I pinned up the patterns of the remaining blocks and the decisions became harder and narrower. 4 wreath type blocks can surround the center block. 2 baskets, one for each side. Trying to balance out colors and prints meant every piece of fabric had to be vetted. Did I use that in a neighboring block? Oh, that was the bird wing, I can't make it a flower center. I used that red for berries in that block, go back and pick another red. Do I make the stems brown or green? If I use green, do I pick one with yellow, or a muted green? And so it goes on and on............
Here are all the prepped blocks on the wall. I also had to balance out that brighter background with the one darker background block. I thought about replacing them, but I think they will add some interest when it's all together and quilted.
I started playing with some sashing ideas. I have a box full of these 1/2 sq tri's from a long ago swap. Hmmm, something to ponder once all the blanket stitching has been done. The bird in the corner is my one of my favorite blocks and it might end up back in the center. It lived there for a while, but I don't have to make those decisions for some time.
Here are a few close-up shots of the blocks. Again, not much has been stitched down, that will be my winter project. As usual, click pictures for larger shots.
All the blocks have been put away. I store them on a pant hanger with a zip bag around them and that takes much less space than another box in my sewing room.
Ahhhhh, here is my basket of CW fabric with my basket of scraps. So organized and neat and tidy.
And I've reclaimed my cutting table. No more bits of fusible, light box has been tucked away, scraps and test fabrics and pieces that didn't make the cut are all cleaned up.
Thank you Lori, at Humble Quilts, for instigating this. Karen, sorry I didn't stick to the plan. I love these blocks, and I know it will be a great winter project for me. I've already picked the next quilt box to open up and get to work on. But this next one is a 2 color quilt, the blocks are made and I'm onto the setting strips. No decisions left, just the process of pinning, stitching, and pressing!
Keep on stitching,
Sharon
Monday, August 3, 2015
Old Voices, New Impressions
I'm sure you've seen several posts with the title in the last week. Karen and Nancy have shown their blocks and I'm sure Lori, aka Humble Quilts will show hers off some time this month. Yup, I've jumped in and am going to do my best to stay up to date on this quilt along. Now that Whatnot's is finished, I have a little extra time in my sewing room. I like to take a break from the longarm several times during the day, and a little machine applique is the perfect task for me right now.
Four blocks per month, and we started in July. OK, four blocks are looking good. Please do not look at my blocks for reference. I am doing fusible machine applique and I did not "flip for fusible". ALL my blocks will be mirror image but there are no blocks that will make this look odd.
But since I had everything out, I thought I'd just keep marking the fusible web with more shapes from more blocks. I've also tried to make mine a bit different than the pattern by not looking at the color pictures. I'm striving for brightness from the appliqued pieces against the creamy backgrounds.
Four became eight and now there are four more. But don't get too excited about my progress. These blocks are simply prepped. Now comes the investment of time to get all the blanket stitching done around each shape. I started with green, and got quite a bit done.
This is the only block that is completely finished. OK, I still need to stitch the stems with dark brown. It's the closest one to finished.
Here is the group of them together. I am LOVING this quilt. I have chosen 25 different shirting prints for backgrounds and tried to stay away from the whiter ones. Patterns were blown up 100% and I cut the backgrounds 12 1/2". They may get trimmed down and stitched edge to edge or there might be some sashing around the blocks. That decision will be made once all 25 blocks are together.
Old Voices, New Impressions by Jeana Kimball is the book that we are using. I have several of her books, and they are great to have in your library. c'mon, join along! If you don't have this book, pick another appliqued project and have some fun! My goal is to have 4 blocks completely stitched by the 15ht of each month. I think that's a reasonable goal.
Keep stitching,
Sharon
Four blocks per month, and we started in July. OK, four blocks are looking good. Please do not look at my blocks for reference. I am doing fusible machine applique and I did not "flip for fusible". ALL my blocks will be mirror image but there are no blocks that will make this look odd.
But since I had everything out, I thought I'd just keep marking the fusible web with more shapes from more blocks. I've also tried to make mine a bit different than the pattern by not looking at the color pictures. I'm striving for brightness from the appliqued pieces against the creamy backgrounds.
Four became eight and now there are four more. But don't get too excited about my progress. These blocks are simply prepped. Now comes the investment of time to get all the blanket stitching done around each shape. I started with green, and got quite a bit done.
This is the only block that is completely finished. OK, I still need to stitch the stems with dark brown. It's the closest one to finished.
Here is the group of them together. I am LOVING this quilt. I have chosen 25 different shirting prints for backgrounds and tried to stay away from the whiter ones. Patterns were blown up 100% and I cut the backgrounds 12 1/2". They may get trimmed down and stitched edge to edge or there might be some sashing around the blocks. That decision will be made once all 25 blocks are together.
Keep stitching,
Sharon
Subscribe to:
Posts (Atom)